Mini Apple Hand Pies: Crispy and Irresistibly Sweet
There’s nothing quite like the cozy aroma of freshly baked Mini Apple Hand Pies wafting through the kitchen, making your mouth water with anticipation. These delightful little treats are crispy on the outside, bursting with spiced apple goodness on the inside, and absolutely perfect for a snack or dessert. I whipped up this recipe during one of those busy weeks when my family craved something sweet yet wholesome. With just 250 calories each and packed with protein from the whole wheat pastry, these hand pies are a guilt-free indulgence that satisfy both cravings and nutritional needs.
I still remember the first time I made Mini Apple Hand Pies; it was a chilly Sunday afternoon in October. My teenagers had just returned from soccer practice, their cheeks flushed and eyes wide with hunger. As I pulled the golden-brown pies from the oven, my daughter exclaimed, “Wow, Mom! These smell amazing!” The secret twist in this recipe is using a hint of cinnamon and nutmeg in the filling that elevates it beyond your average apple pie. To my delight, they devoured them in minutes, and my son even came back for seconds, declaring them “the best things you’ve ever made!”
Ingredients for the Mini Apple Hand Pies
Each ingredient in this dish plays an essential role in flavor and texture. Here’s what you’ll need:
- 1 cup all-purpose flour (plus extra for dusting): Provides the structure for a flaky crust.
- 1/2 cup unsalted butter (cold and cubed): Ensures a rich, tender texture with a delicious buttery flavor.
- 1/4 cup granulated sugar: Adds a touch of sweetness to balance the savory elements.
- 1/4 teaspoon salt: Enhances the overall flavors and brings depth to the crust.
- 3 tablespoons ice water (more if needed): Helps bind the dough together without melting the butter.
- 2 cups peeled and diced apples (Granny Smith or Honeycrisp): Offers a sweet-tart flavor that defines the filling.
- 1/4 cup brown sugar: Contributes caramel notes that complement the apples beautifully.
- 1 teaspoon cinnamon: Infuses warm, cozy spice that elevates the apple filling.
- 1/4 teaspoon nutmeg: Adds a subtle earthiness to enhance the spiced flavor profile.
- 1 tablespoon lemon juice: Brightens the filling and prevents browning of the apples.
- 1 large egg: Acts as a binder for the egg wash, giving a golden shine to the crust.
- 1 tablespoon water: Thins out the egg for an even application in the wash.
Step-by-Step Instructions
I recommend starting with the pie crust to give it enough time to chill and firm up while you prepare the filling.
Step 1: In a mixing bowl, combine 1 cup of all-purpose flour, 1/4 cup of granulated sugar, and 1/4 teaspoon of salt. Next, take your cold, cubed butter and add it to the mixture. Use a pastry cutter or your fingers to mix until the texture resembles coarse crumbs. This step is crucial because a crumbly texture ensures your crust will be flaky once baked. Slowly add in 3 tablespoons of ice water, mixing gently until the dough begins to form. If it seems too dry, add a bit more ice water, but try not to overwork it. Once combined, wrap the dough in plastic wrap and refrigerate for at least 30 minutes.
Step 2: While your dough chills, prepare the apple filling. In a separate bowl, mix together 2 cups of peeled and diced apples with 1/4 cup of brown sugar, 1 teaspoon of cinnamon, 1/4 teaspoon of nutmeg, and 1 tablespoon of lemon juice until everything is well combined. The lemon juice not only adds flavor but also helps prevent the apples from browning. This filling is where the magic happens; I love using Granny Smith or Honeycrisp apples for their perfect balance of tartness and sweetness.
Step 3: Preheat your oven to 400°F (200°C). Take your chilled dough out of the refrigerator and roll it out on a floured surface until it’s about 1/8 inch thick. Using a round cutter or a glass about 4 inches in diameter, cut out circles from the rolled-out dough. Place about a spoonful of apple filling on one half of each circle—don’t overfill or they may burst during baking!
Step 4: Carefully fold the dough over the filling to create a half-moon shape and seal the edges using a fork; this not only secures the filling inside but also gives it a nice decorative touch. Repeat this process with any remaining dough and filling until everything is used up. It’s worth taking your time here because properly sealed edges mean less leakage during baking.
Step 5: For that beautiful golden finish on your hand pies, mix together one large egg and 1 tablespoon of water to create an egg wash. Brush this mixture generously over the tops of each pie; this will help them develop a lovely color as they bake. Place them on a baking sheet lined with parchment paper for easy cleanup.
Step 6: Pop those hand pies into your preheated oven and bake for about 20-25 minutes or until they turn golden brown and deliciously fragrant. Keep an eye on them as all ovens can vary; you want them to look irresistible! Once they’re done, let them cool slightly before serving so you don’t burn your tongue on that hot apple filling.
What to Serve with Mini Apple Hand Pies
This dish is already incredibly filling and balanced, but these sides add extra variety and nutrition to round out your meal perfectly.
Cinnamon Yogurt Dip: A creamy blend of Greek yogurt, honey, and a dash of cinnamon creates a delightful dip that complements the spiced apple flavors of the hand pies. The tanginess of the yogurt balances the sweetness of the pies while providing an extra protein boost—about 10 grams per serving! My kids love dipping their hand pies in this, making it a fun addition to our dessert nights.
Mixed Green Salad with Apples and Walnuts: A refreshing salad featuring mixed greens, sliced apples, toasted walnuts, and a light vinaigrette brings a crisp texture and nutty flavor that harmonizes beautifully with the hand pies. The vitamins from the greens and healthy fats from the walnuts not only enhance the meal’s nutritional profile but also offer a satisfying crunch. This salad is my go-to during family gatherings to keep things light yet flavorful.
Quinoa Pilaf with Dried Fruits: This savory pilaf combines fluffy quinoa with sautéed onions, dried cranberries, and a sprinkle of cinnamon for a hearty side that echoes the warm spices in the hand pies. Quinoa is packed with protein—around 8 grams per cup—making it an excellent choice when you want to increase energy without feeling weighed down. We often prepare this during meal prep for quick lunches throughout the week.
Sweet Potato Wedges: These oven-baked sweet potato wedges are simply seasoned with olive oil, salt, and paprika for a crispy exterior and tender interior. Their natural sweetness contrasts nicely with the spiced apples in the hand pies while providing fiber and vitamins A and C. We enjoy them as a family-friendly side for game nights where everyone can munch happily!
Storage & Serving Tips
To store your Mini Apple Hand Pies for meal prep, place them in an airtight container in the fridge where they will stay fresh for up to 4 days. If you have extra Pie Crust, consider wrapping it tightly in plastic wrap and placing it in a separate container; this will help maintain its texture and prevent it from drying out. The Apple Filling can also be stored in a separate airtight container for up to 3 days, ensuring the flavors remain vibrant and preventing the crust from becoming soggy.
When reheating, place the Mini Apple Hand Pies in a preheated oven at 350°F for about 10-12 minutes until they are warmed through and the crust is crispy again. Avoid using the microwave for reheating, as it makes the crust soft and disappointing. If you have leftover Apple Filling, you can reheat it on the stovetop over medium heat for about 5 minutes, stirring occasionally until heated through.
Pro tip: To make meal prep easier, consider doubling this recipe on Sundays so you have enough Mini Apple Hand Pies for the week. Family members can self-assemble their own pies by portioning out filling into pre-made Pie Crust rounds, allowing everyone to customize their flavors. For variety throughout the week, try swapping Granny Smith apples for sweet Honeycrisp or adding dried cranberries to the filling for an extra burst of flavor. To keep your Pie Crust at its best during storage, always ensure it’s wrapped tightly to maintain freshness while preventing any freezer burn if you’re planning to freeze portions for later use.
Conclusion
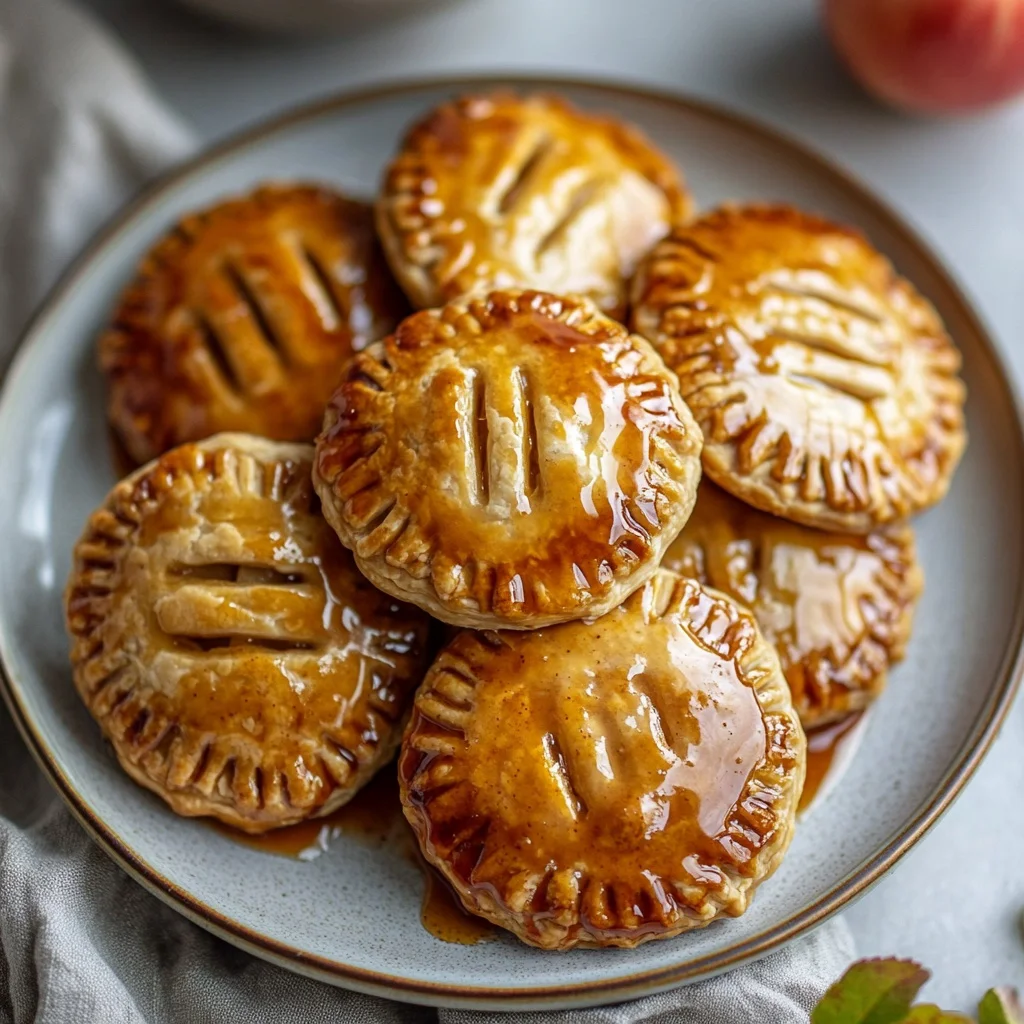
These Mini Apple Hand Pies have become a regular rotation in my kitchen, and I find myself making them at least twice a month because they pack a satisfying 250 calories while delivering a burst of flavor that’s hard to resist. The use of cold, cubed unsalted butter in the pie crust creates an incredibly flaky texture that sets these hand pies apart from any store-bought versions. Give this one a try this week. I promise it’ll become a regular rotation treat in your house too.
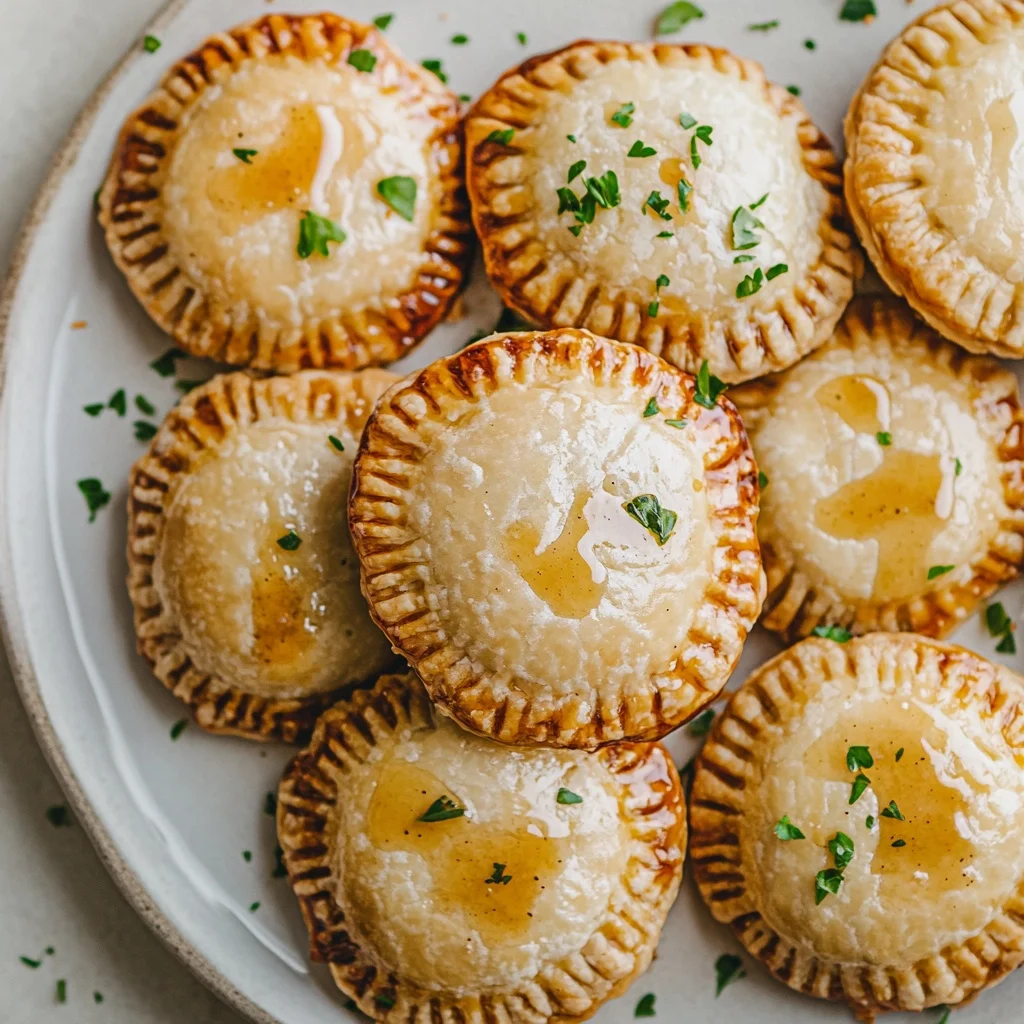
Mini Apple Hand Pies
Ingredients
Method
- In a mixing bowl, combine flour, sugar, and salt. Add cold butter and mix until crumbly.
- Add ice water gradually until dough forms. Wrap in plastic and refrigerate for 30 minutes.
- In a bowl, mix diced apples, brown sugar, cinnamon, nutmeg, and lemon juice until well combined.
- Preheat the oven to 400°F (200°C). Roll out the chilled dough on a floured surface.
- Cut out circles (about 4 inches in diameter) and place a spoonful of apple filling on one half.
- Fold the dough over the filling and seal the edges with a fork. Repeat with remaining dough.
- Mix egg and water to create an egg wash. Brush the tops of the hand pies with the wash.
- Place the pies on a baking sheet and bake for 20-25 minutes or until golden brown.
- Let cool slightly before serving.