Red, White and Blue Pinwheel Icebox Cookies: Irresistible…
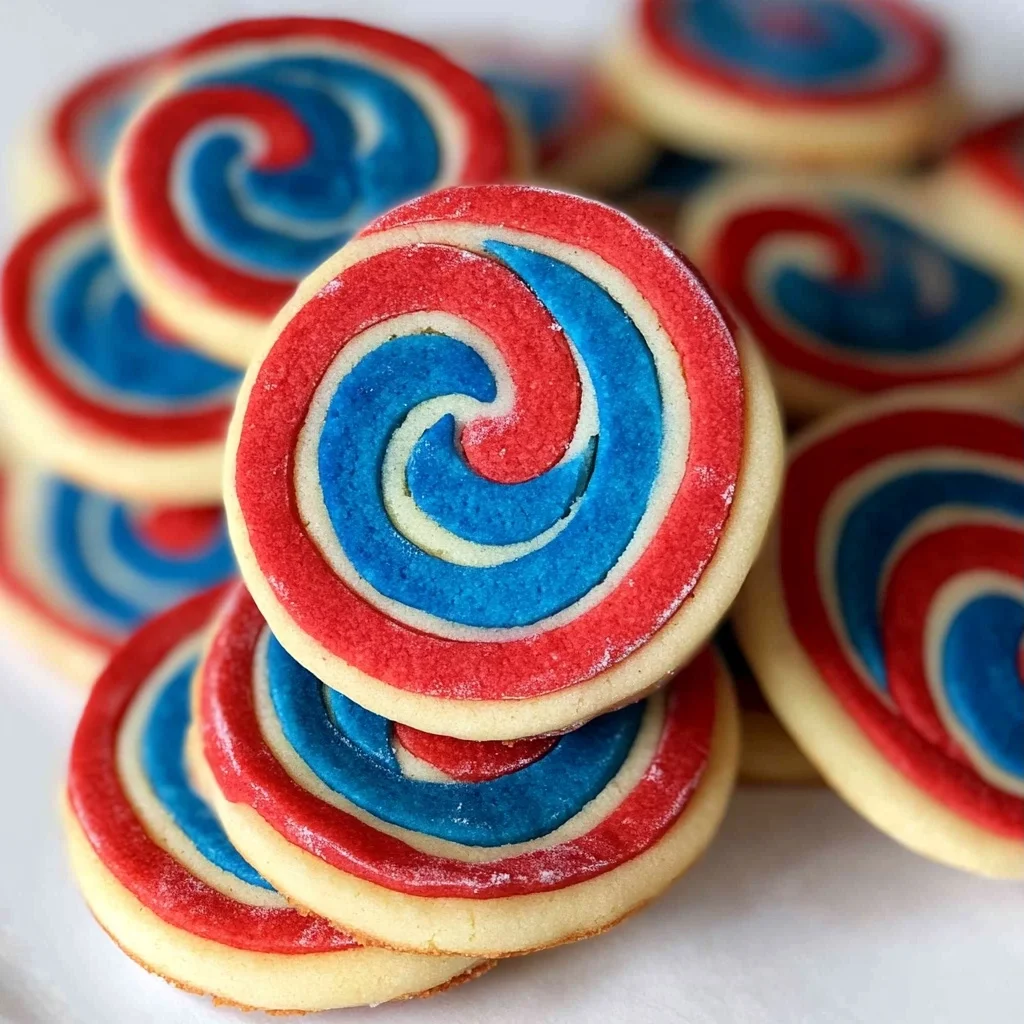
There’s something truly magical about the vibrant layers of my Red, White and Blue Pinwheel Icebox Cookies that makes them irresistible. With their buttery sweetness, a delightful chewiness, and a festive pop of color, they’re crispy, indulgent, and just the right amount of celebratory. Inspired by my desire to create a fun treat for our family gatherings, I whipped up this recipe during a busy week leading up to Independence Day. Each cookie packs in 150 calories, making it a guilt-free way to enjoy a protein-rich snack while still indulging your sweet tooth.
I vividly remember the first time I made these cookies; it was a sunny afternoon just before July 4th, and my kids were buzzing with excitement for the holiday. As I pulled the colorful logs from the fridge, my youngest exclaimed, “Mom! These look like fireworks!” The secret twist is using cream cheese in the dough, which adds an amazing richness that takes these cookies to another level. After taking their first bites, my teenagers couldn’t get enough—my daughter even asked if we could make them again for every family celebration!
Ingredients for the Red, White and Blue Pinwheel Icebox Cookies
Each ingredient in this dish plays an essential role in flavor and texture. Here’s what you’ll need:
1 cup unsalted butter (softened): Provides a rich, creamy base that enhances the cookie’s texture.
1 cup granulated sugar: Sweetens the dough while contributing to its tender structure.
1 large egg: Acts as a binding agent, helping to hold the ingredients together.
2 teaspoons vanilla extract: Infuses a warm, aromatic flavor that complements the sweetness.
2 cups all-purpose flour: Forms the backbone of the cookie, giving it body and structure.
1 teaspoon baking powder: Helps the cookies rise, creating a light and airy texture.
1/2 teaspoon salt: Balances the sweetness and enhances the overall flavor profile.
1 cup red food coloring (for red dough): Creates vibrant color, making these cookies festive and fun.
- 1 cup blue food coloring (for blue dough): Adds a striking hue to complete the patriotic theme.
Step-by-Step Instructions
I recommend starting with the creaming of the butter and sugar, as this step is crucial for achieving a light and fluffy texture that forms the base of your cookies.
Step 1: In a mixing bowl, cream together the softened butter and granulated sugar until light and fluffy. This should take about 3-5 minutes with an electric mixer on medium speed. The mixture should turn pale and airy, which helps create a tender cookie texture. Don’t rush this step; it sets the stage for the rest of your cookie dough.
Step 2: Beat in the egg and vanilla extract until well combined. Make sure to scrape down the sides of the bowl to incorporate all ingredients fully. This adds moisture and flavor to your dough, enhancing each bite with that lovely vanilla aroma.
Step 3: In a separate bowl, whisk together the flour, baking powder, and salt. This step ensures that your dry ingredients are evenly distributed, which is essential for a uniform rise in your cookies. I usually use a whisk or fork to break up any clumps in the flour; it makes a big difference in the final texture.
Step 4: Gradually add the dry ingredients to the wet mixture, mixing until just combined. Be careful not to overmix at this stage; you want to avoid developing gluten that could lead to tough cookies. A few visible streaks of flour is perfectly fine.
Step 5: Divide the dough into three equal portions. Use a kitchen scale if you have one; it helps ensure even layers when rolling out your pinwheels. This division is key for achieving those vibrant red, white, and blue layers in your cookies.
Step 6: Leave one portion plain (white), and color one portion red with food coloring and the other blue. When adding food coloring, start with a few drops and mix thoroughly until you reach your desired shade. It’s easier to add more than to correct if you’ve gone overboard!
Step 7: On a floured surface, roll out the white dough into a rectangle about 1/4 inch thick. Keep your rolling pin lightly floured to prevent sticking but avoid using too much flour as it can alter the dough consistency. I find that measuring out my rectangles helps keep them uniform for even baking.
Step 8: Roll out the red dough into a rectangle of the same size and place it on top of the white dough. Gently press down to ensure they stick together without squishing them out of shape too much—this layering is what gives you those beautiful pinwheel swirls.
Step 9: Roll out the blue dough into a rectangle and place it on top of the red dough. Again, make sure all three layers adhere well by lightly pressing down before rolling up from one end carefully.
Step 10: Starting from one end, carefully roll the layered dough into a log. Try to keep it tight but not so tight that you push out filling or cause cracking; this is where gentle handling pays off! If you have excess flour on your surface or dough, be sure to brush it off before rolling to keep everything cohesive.
Step 11: Wrap the log in plastic wrap and refrigerate for at least 2 hours or until firm. Chilling is vital here—it allows flavors to meld while also making slicing much easier later on. You can even prepare this ahead of time if you’re planning for an event!
Step 12: Preheat the oven to 350°F (175°C). This temperature is ideal for ensuring even cooking without burning those lovely edges we want golden brown later on.
Step 13: Slice the chilled dough into 1/4 inch thick rounds and place them on a baking sheet lined with parchment paper. Using a sharp knife will give you clean cuts—I usually wipe my knife between slices if I notice any sticking or smearing from colored layers.
Step 14: Bake for 8-10 minutes or until the edges are lightly golden. Keep an eye on them; ovens can vary widely! You want that slight firmness when you tap them gently—if they feel too soft, give them another minute or two.
Step 15: Allow the cookies to cool on the baking sheet for a few minutes before transferring to a wire rack to cool completely. This cooling process lets them firm up while still warm; transferring too early could lead to breakage!
Step 16: Serve and enjoy your festive Red, White and Blue Pinwheel Icebox Cookies! These are perfect for sharing at gatherings—everyone loves their vibrant colors!
What to Serve with Red, White and Blue Pinwheel Icebox Cookies
This dish is already incredibly filling and balanced, but these sides add extra variety and nutrition to round out your meal perfectly.
Patriotic Fruit Salad: A mix of fresh strawberries, blueberries, and banana slices tossed with a drizzle of honey makes for a refreshing side that complements the sweetness of the cookies. The bright colors not only enhance the festive theme but also provide vitamins C and A, boosting your immune health. My kids love this salad as a light treat after indulging in the cookies, making it a staple at our summer gatherings.
Creamy Avocado Dip: Made with ripe avocados, Greek yogurt, lime juice, and a touch of garlic powder, this dip is smooth and rich while providing healthy fats that satisfy hunger. The creaminess pairs wonderfully with the dessert’s sweetness, balancing flavors beautifully. Plus, it offers about 4 grams of protein per serving—perfect for fueling active afternoons spent outdoors with family and friends.
Corn on the Cob with Herb Butter: Grilled corn brushed with herb-infused butter adds a smoky sweetness that contrasts delightfully with the sugary cookies. The fresh herbs elevate the dish and provide additional fiber—great for digestion! This is often my go-to side at backyard barbecues; it’s simple yet always requested by friends and family looking for that perfect summer bite.
Zesty Quinoa Salad: Combining cooked quinoa with cherry tomatoes, cucumber, cilantro, and a zesty lime vinaigrette creates a light yet protein-packed side dish that enhances your meal. The nutty flavor of quinoa echoes the buttery richness of the cookies while adding about 8 grams of protein per serving—ideal for those seeking plant-based options after enjoying something sweet. I often make this salad in bulk for meal prep; it keeps well all week!
Storage & Serving Tips
To store your Red, White and Blue Pinwheel Icebox Cookies for meal prep, place the cookies in an airtight container, separating layers with parchment paper to prevent sticking. They can be stored in the fridge for up to 5 days. If you have leftover cookie dough before baking, wrap it tightly in plastic wrap and keep it in a separate airtight container in the refrigerator for up to a week, or freeze it for longer storage.
When reheating your cookies, the best method is to place them on a baking sheet in a preheated oven at 350°F for about 5 minutes to restore their fresh-baked texture. Avoid microwaving as it makes the cookies soft and less enjoyable; if you must use the microwave, limit it to 15-20 seconds just to warm them slightly without making them mushy.
Pro tip: To batch cook these cookies for the week, consider doubling the recipe on a Sunday and portioning them into individual containers for easy grab-and-go snacks. Family members can self-assemble their own cookie plates by mixing and matching flavors throughout the week. For variety, swap out some of the red food coloring with green for festive themes or add cocoa powder for chocolate-flavored dough. To keep the cookies at their best during meal prep storage, ensure you always store any frosting or cream cheese filling separately from the cookies until ready to serve to prevent sogginess.
Conclusion

These Red, White and Blue Pinwheel Icebox Cookies have become a regular rotation recipe for me, as I whip them up at least twice a month; they’re not only festive but also delightfully satisfying at 150 calories each. The vibrant layers of red and blue dough truly set these cookies apart from any other dessert, making them a visual treat that everyone loves. Give this one a try this week. I promise it’ll become a regular in your house too.
Red, White and Blue Pinwheel Icebox Cookies
Ingredients
Method
- In a mixing bowl, cream together the softened butter and granulated sugar until light and fluffy.
- Beat in the egg and vanilla extract until well combined.
- In a separate bowl, whisk together the flour, baking powder, and salt.
- Gradually add the dry ingredients to the wet mixture, mixing until just combined.
- Divide the dough into three equal portions.
- Leave one portion plain (white), and color one portion red with food coloring and the other blue.
- On a floured surface, roll out the white dough into a rectangle about 1/4 inch thick.
- Roll out the red dough into a rectangle of the same size and place it on top of the white dough.
- Roll out the blue dough into a rectangle and place it on top of the red dough.
- Starting from one end, carefully roll the layered dough into a log.
- Wrap the log in plastic wrap and refrigerate for at least 2 hours or until firm.
- Preheat the oven to 350°F (175°C).
- Slice the chilled dough into 1/4 inch thick rounds and place them on a baking sheet lined with parchment paper.
- Bake for 8-10 minutes or until the edges are lightly golden.
- Allow the cookies to cool on the baking sheet for a few minutes before transferring to a wire rack to cool completely.
- Serve and enjoy your festive Red, White and Blue Pinwheel Icebox Cookies!