Korean Popcorn Chicken: Crispy and Flavor-Packed Delight
There’s nothing quite like the crunch of crispy, flavorful popcorn chicken coated in a spicy Korean sauce that makes your taste buds dance! Imagine sinking your teeth into tender, juicy bites that are crispy, savory, and deliciously addictive—all while packing in around 400 calories and a solid protein boost. I created this Korean Popcorn Chicken recipe during one of those hectic weeks when my family craved something fun yet nutritious for dinner. It quickly became a go-to dish that satisfies cravings and fuels our busy lifestyles.
I’ll never forget the first time I served this dish; it was a rainy Saturday afternoon, and my teenagers had just finished a grueling soccer practice. As soon as they took their first bites, my daughter exclaimed, “This is way better than takeout!” The secret twist that elevates my version is the addition of gochujang, a savory-sweet Korean chili paste that gives each piece an irresistible kick. After polishing off the entire platter, my son asked if we could make it again next week—and trust me, that’s high praise coming from him!
Ingredients You’ll Need
Each ingredient in this dish plays an essential role in flavor and texture. Here’s what you’ll need:
Chicken
1 pound boneless chicken thighs: These provide juicy tenderness that soaks up the flavors beautifully.
1 cup buttermilk: Acts as a tenderizing marinade, ensuring the chicken is moist and flavorful.
1 cup all-purpose flour: Creates a crispy coating that adds delightful texture to each bite.
1 teaspoon salt: Enhances the overall flavor and helps balance the spices.
1 teaspoon black pepper: Adds a subtle heat that complements the spices in the dish.
1 teaspoon garlic powder: Infuses a warm, savory note that elevates the chicken’s flavor profile.
1 teaspoon onion powder: Brings a hint of sweetness and depth to the seasoning mix.
1 teaspoon paprika: Adds a mild smokiness and vibrant color to the crispy coating.
Step-by-Step Instructions
I recommend starting with marinating the chicken first, as it needs at least 30 minutes to soak in the buttermilk, which ensures a juicy and flavorful final product.
Step 1: In a mixing bowl, combine the bite-sized pieces of boneless chicken thighs with 1 cup of buttermilk. Make sure all the chicken is well-coated in the buttermilk for maximum flavor and tenderness. Cover the bowl and refrigerate for at least 30 minutes; this step is crucial as it not only helps to tenderize the meat but also allows it to absorb moisture, so your popcorn chicken won’t dry out during frying.
Step 2: While the chicken marinates, prepare your coating by mixing together 1 cup of all-purpose flour, 1 teaspoon each of salt, black pepper, garlic powder, onion powder, and paprika in another bowl. This blend adds a wonderful depth of flavor and a touch of spice to your crispy coating. If you prefer an extra crunch, you can even double-dip the chicken after dredging it in this mixture.
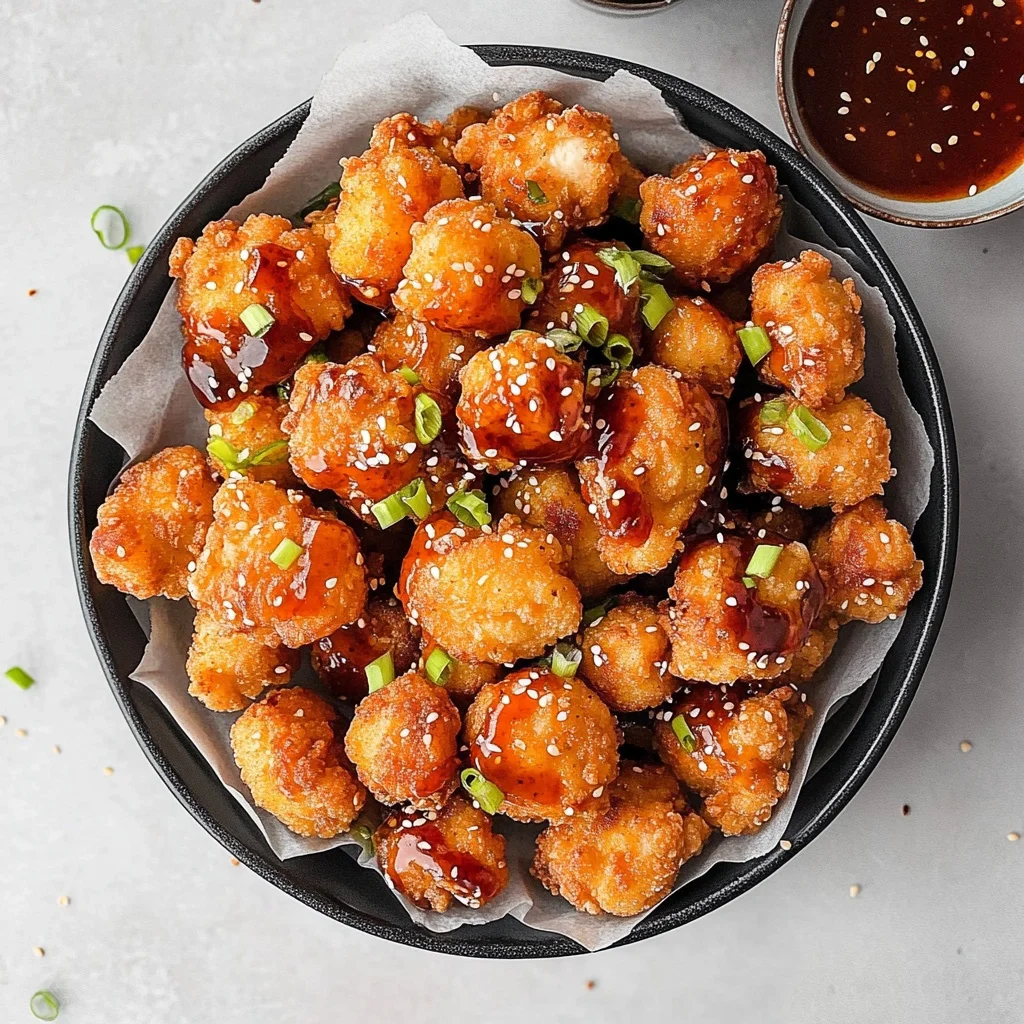
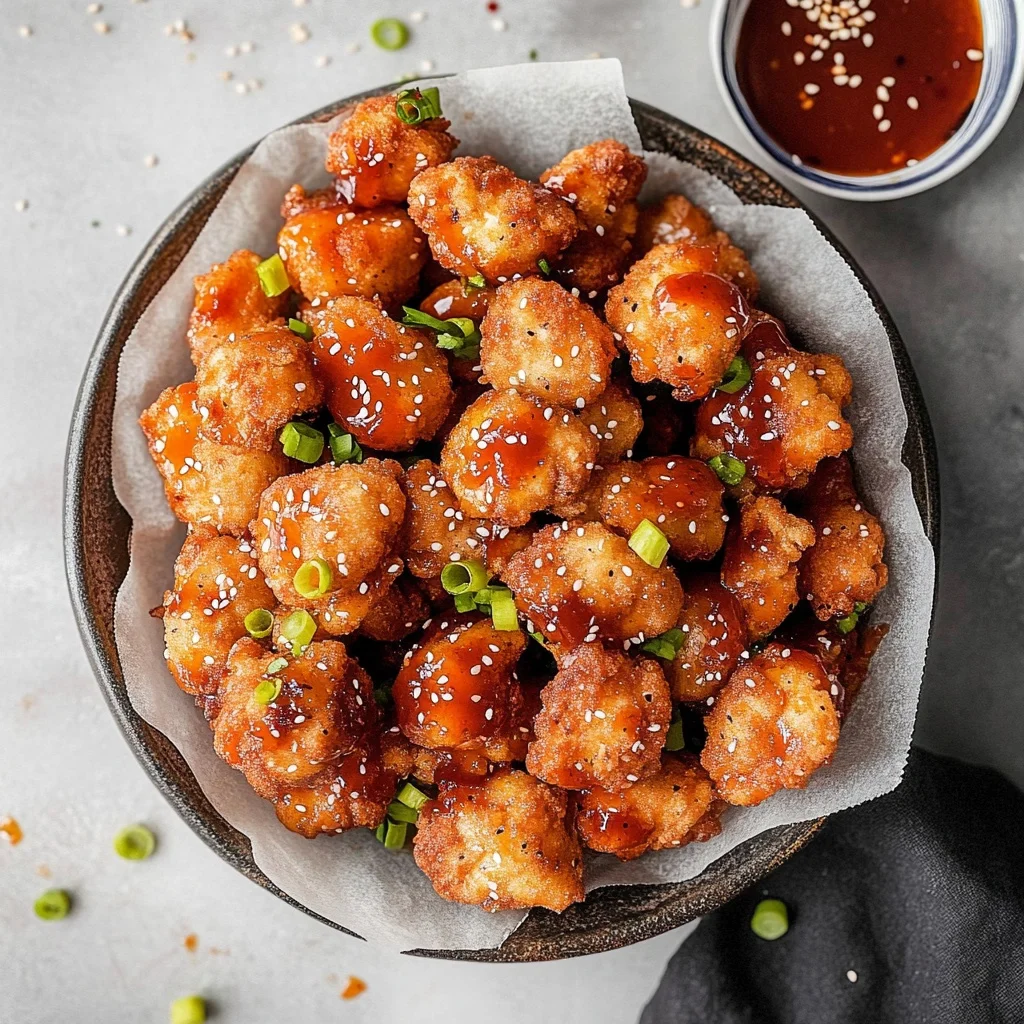
Step 3: Now it’s time to whip up that delicious Korean sauce! In a small bowl, whisk together 2 tablespoons of gochujang, 2 tablespoons of soy sauce, 1 tablespoon of honey, 1 tablespoon of sesame oil, 1 teaspoon of rice vinegar, and 1 teaspoon of minced garlic until smooth. This sauce will provide a perfect balance of heat and sweetness that will elevate your popcorn chicken. Taste it as you go—feel free to adjust any ingredients based on your preference!
Step 4: Heat oil in a deep fryer or a large pot to about 350°F (175°C). Use enough oil so that the chicken can float freely while frying; this promotes even cooking and crispiness. I usually recommend maintaining an oil temperature within this range for optimal frying results. Too hot and your coating might burn before the chicken cooks through; too cool and you’ll end up with greasy pieces instead of crispy ones.
Step 5: Once the oil is ready, remove the marinated chicken from the refrigerator. Allow any excess buttermilk to drip off before dredging each piece in your prepared flour mixture. Shake off any excess flour; this will help create that beautiful crispy crust when fried. Frying in batches is key here—don’t overcrowd the pot—and aim for about 5-7 minutes per batch until they reach a golden brown color with no pink remaining inside.
Step 6: After frying each batch, use a slotted spoon to transfer the chicken onto paper towels to drain any excess oil. This step ensures your popcorn chicken stays crispy rather than soggy. I often check one piece to make sure it’s cooked through—ideal doneness should be golden brown on the outside and steaming hot throughout.
Step 7: In a large bowl, toss together your perfectly fried chicken with the prepared Korean sauce until every piece is well-coated. This step is where all those flavors come alive! Ensure you mix gently so as not to break apart your crispy creations while achieving an even coating.
Step 8: Finally, garnish your delicious Korean popcorn chicken with sesame seeds and sliced scallions before serving immediately while it’s still warm. The finishing touches not only add visual appeal but also enhance flavor with their crunch and freshness—my family loves this extra touch! Enjoy this tasty snack or appetizer straight away for maximum enjoyment.
What to Serve with Korean Popcorn Chicken
This dish is already incredibly filling and balanced, but these sides add extra variety and nutrition to round out your meal perfectly.
Cucumber Sesame Salad: This refreshing salad features thinly sliced cucumbers tossed in a light dressing of rice vinegar, sesame oil, and a sprinkle of sesame seeds. The crispness of the cucumbers provides a cooling contrast to the spicy popcorn chicken, while adding hydration and vitamins—a perfect way to balance out the meal’s richness. It’s a staple in my household during summer barbecues, as it’s quick to prepare and always disappears fast.
Steamed Jasmine Rice: Fluffy jasmine rice seasoned lightly with salt serves as a neutral base that soaks up the delicious Korean sauce from the chicken. This side adds necessary carbs for energy, making it great for active families or post-workout meals, packing around 4 grams of protein per serving. My kids love having this alongside their favorite chicken dishes—it’s a comforting classic on our dinner table.
Spicy Kimchi Slaw: A vibrant mix of cabbage, carrots, and spicy kimchi creates a zesty slaw that complements the flavors of the popcorn chicken beautifully. The crunchiness enhances the texture of the meal while delivering probiotics for gut health. With minimal calories yet packed with vitamins A and K, it’s an easy way for me to sneak in more veggies during family dinners.
Avocado Toast with Chili Flakes: Creamy avocado spread on whole-grain bread topped with chili flakes delivers healthy fats and fiber. The richness of the avocado balances out the spice of the chicken, creating a satisfying bite that’s both filling and nutritious—around 6 grams of protein if you add an egg on top! This has become a family favorite for brunch-style dinners; it’s easy to prepare while still feeling indulgent.
Storage & Serving Tips
Store your Korean popcorn chicken in separate airtight containers in the fridge for up to 4 days. Keep the crispy popcorn chicken and the Korean sauce in individual containers to maintain texture and flavor. For best results, store the cooked — Chicken — in one container and the sauce in another, while garnishes like scallions and sesame seeds should be kept in small, separate containers until you are ready to serve.
When reheating, place the popcorn chicken back in a preheated oven at 400°F for about 8–10 minutes to restore its crispy texture; this method is far superior to microwaving, which will make it soft and disappointing. To reheat the Korean sauce, simply warm it on the stove over low heat or in the microwave for 30-second intervals until heated through. Be sure to stir the sauce as it warms to ensure even heating.
Pro tip: For efficient meal prep, consider doubling the recipe on Sundays and portioning out servings into individual containers for easy grab-and-go lunches throughout the week. Family members can self-assemble their own bowls by including rice or noodles as a base with — Chicken — and Korean sauce layered on top. For variety, swap out chicken for shrimp or tofu, and add extra veggies like bell peppers or broccoli to boost nutrition. To keep the popcorn chicken crisp during storage, avoid combining it with any sauces until serving time.
Conclusion
This Korean Popcorn Chicken has become a regular rotation recipe for me, and I whip it up almost every week because it’s genuinely easy, incredibly satisfying, and packs 400 calories per serving without sacrificing flavor. The buttermilk marinade is what elevates this dish above typical popcorn chicken, ensuring that each bite is tender and juicy with a crispy exterior. Give this one a try this week. I promise it’ll become a regular rotation meal in your house too.
Korean Popcorn Chicken
Ingredients
Method
- In a mixing bowl, combine the chicken pieces with buttermilk. Cover and refrigerate for at least 30 minutes.
- In another bowl, mix together flour, salt, pepper, garlic powder, onion powder, and paprika.
- In a small bowl, whisk together gochujang, soy sauce, honey, sesame oil, rice vinegar, and minced garlic until smooth.
- Heat oil in a deep fryer to 350°F (175°C).
- Remove chicken from the marinade, allowing excess to drip off. Dredge each piece in the flour mixture, shaking off excess flour.
- Fry chicken in batches for about 5-7 minutes, or until golden brown and cooked through. Remove and drain on paper towels.
- In a large bowl, toss the fried chicken with the prepared sauce until well coated.
- Garnish with sesame seeds and sliced scallions. Serve immediately.