Cookie Butter Cookies: Chewy and Irresistibly Delicious
Imagine sinking your teeth into a warm, chewy cookie that bursts with the irresistible flavor of cookie butter—sweet, spiced, and oh-so-comforting. These Cookie Butter Cookies are not just delicious; they’re also packed with protein to fuel your day with every bite. With each soft and chewy morsel, you’ll experience a delightful blend of rich and creamy textures, all while enjoying a treat that fits perfectly into your busy lifestyle at just 120 calories each. I created this recipe during a hectic week when I wanted something indulgent yet nutritious for my family’s snack stash.
I still remember the first time I baked these cookies on a rainy Saturday afternoon. My daughter walked into the kitchen, her eyes lighting up as the scent of cookie butter wafted through the air. “Can we have these every week?” she asked, her voice filled with excitement after the first warm bite. The twist here is that instead of using standard flour, I incorporate cookie butter itself to enhance both flavor and texture in a way that sets them apart from typical cookies. That day ended with my son asking for seconds while I couldn’t help but smile at their delighted reactions—it was clear these cookies were destined to become a family favorite!
Ingredients for the Cookie Butter Cookies
Each ingredient in this dish plays an essential role in flavor and texture. Here’s what you’ll need:
2 cups all-purpose flour: Provides structure and a soft, chewy texture to the cookies.
1 teaspoon baking soda: Acts as a leavening agent to help the cookies rise.
1 teaspoon salt: Enhances the sweetness and balances the flavors.
1 cup cookie butter (smooth variety): Infuses rich, spiced flavor and moisture throughout the cookies.
1/2 cup unsalted butter (softened): Contributes creaminess and depth of flavor for a tender bite.
1 cup brown sugar (packed): Adds caramel notes and helps create a chewy texture.
1/2 cup granulated sugar: Sweetens the cookies while promoting a slightly crisp exterior.
1 large egg: Binds the ingredients together for a cohesive dough.
- 1 teaspoon vanilla extract: Introduces warmth and enhances the overall flavor profile.
Step-by-Step Instructions
I recommend starting by preheating your oven, as it allows you to jump straight into baking once your dough is ready, ensuring everything bakes perfectly together.
Step 1: Preheat your oven to 350°F (175°C) and line a baking sheet with parchment paper. This step is crucial because a properly heated oven will help your cookies bake evenly and rise beautifully. The parchment paper also prevents sticking, making cleanup a breeze.
Step 2: In a mixing bowl, whisk together the flour, baking soda, and salt until well combined. This step ensures that the leavening agent is evenly distributed throughout the flour, which is key for achieving that soft and chewy texture in your cookies. Take a moment to aerate the flour as you whisk; it can help create lighter cookies.
Step 3: In another bowl, use an electric mixer to cream together the cookie butter, softened butter, brown sugar, and granulated sugar until light and fluffy. I love this step because it builds a rich flavor base for your cookies. Make sure to scrape down the sides of the bowl occasionally—this little detail ensures all ingredients are well incorporated for a perfect cookie dough.
Step 4: Beat in the egg and vanilla extract until fully incorporated. This not only adds moisture but also enhances the overall flavor profile of your cookies. I usually let the egg come to room temperature before adding it; this helps it blend more smoothly into the mixture.
Step 5: Gradually add the dry ingredients to the wet ingredients, mixing until just combined. Be careful not to overmix here—this step is all about creating a tender texture without developing too much gluten. If you see any streaks of flour remaining, that’s okay; they’ll incorporate as you fold the dough later.
Step 6: Using a spatula or cookie scoop, drop tablespoon-sized amounts of dough onto the prepared baking sheet, spacing them about 2 inches apart. It’s important to give them enough room to spread while baking; otherwise, they’ll end up as one giant cookie! I find using a cookie scoop makes this process much easier and keeps my cookies uniform in size.
Step 7: Bake in the preheated oven for 10-12 minutes, or until the edges are lightly golden. You’ll know they’re done when they look slightly puffed and set around the edges while still being soft in the center. Trust me; it’s better to take them out on the earlier side for that perfect chewy bite!
Step 8: Remove from the oven and let the cookies cool on the baking sheet for 5 minutes before transferring them to a wire rack to cool completely. This cooling time on the sheet allows them to firm up just enough so they don’t break apart when you move them. I always find it hard to resist snacking on one warm from the oven—seriously delicious!
What to Serve with Cookie Butter Cookies
This dish is already incredibly filling and balanced, but these sides add extra variety and nutrition to round out your meal perfectly.
Fresh Berry Salad: A refreshing mix of strawberries, blueberries, and raspberries tossed with a light honey-lime dressing brightens up the palate after the rich flavor of the cookie butter. The tartness of the berries contrasts beautifully with the sweetness of the cookies, while providing a boost of vitamins and antioxidants to keep your immune system strong. My kids love this salad as a side for cookie parties, making it a family favorite that balances out dessert.
Coconut Quinoa: Fluffy quinoa cooked in coconut milk offers a subtle sweetness that echoes the flavors of cookie butter while adding a unique texture to your plate. This nutrient-dense grain provides approximately 8 grams of protein per cup, making it an excellent option for those looking to increase their macros without sacrificing taste. I often whip up a batch ahead of time for meal prep; it’s perfect as a healthy side or even as breakfast.
Creamy Avocado Dip: This smooth dip made from ripe avocados, Greek yogurt, lime juice, and spices adds healthy fats that complement the sweetness of the cookies. The creamy texture provides a delightful contrast while boosting your meal with beneficial omega-3 fatty acids. My family loves dipping apple slices into this alongside cookie butter cookies; it’s become our go-to snack combo.
Churro-Spiced Sweet Potato Wedges: Baked sweet potato wedges sprinkled with cinnamon and sugar mirror the warm spice notes found in cookie butter, creating a harmonious flavor experience. Not only do they offer complex carbohydrates for sustained energy, but they also pack about 4 grams of fiber per serving, promoting digestive health. These are a hit at our home during gatherings; they add an exciting twist that everyone enjoys!
Storage & Serving Tips
To store your Cookie Butter Cookies effectively, place them in an airtight container at room temperature for up to 5 days. If you want to extend their freshness, consider refrigerating them for up to 2 weeks. However, if you’re prepping these cookies as part of a meal plan, it’s best to keep the dry ingredients (2 cups all-purpose flour, 1 teaspoon baking soda, and 1 teaspoon salt) separate from the wet ingredients (1 cup cookie butter, 1/2 cup unsalted butter, 1 cup packed brown sugar, 1/2 cup granulated sugar, 1 large egg, and 1 teaspoon vanilla extract) until you’re ready to bake. This way, you maintain the optimal texture and flavor.
When reheating your Cookie Butter Cookies, the best method is to preheat your oven to 350°F and warm them on a baking sheet for about 5-7 minutes. This will help restore their soft and chewy texture. Avoid microwaving them as it can make the cookies soft and disappointing; instead, stick with the oven method for the best results. If you’ve stored any leftovers in the fridge, allow them to come to room temperature before reheating for even better consistency.
Pro tip: To batch cook these delicious cookies for the week, consider doubling the recipe on your Sunday prep day and portioning them into individual containers for easy grab-and-go snacks. Family members can self-assemble their cookie portions by combining different flavors of cookie butter or swapping in nut butters like almond or peanut for variety across the week. To keep your cookies at their best during meal prep storage, store them with a slice of bread in the container; this will help maintain moisture and keep them soft throughout the week.
Conclusion
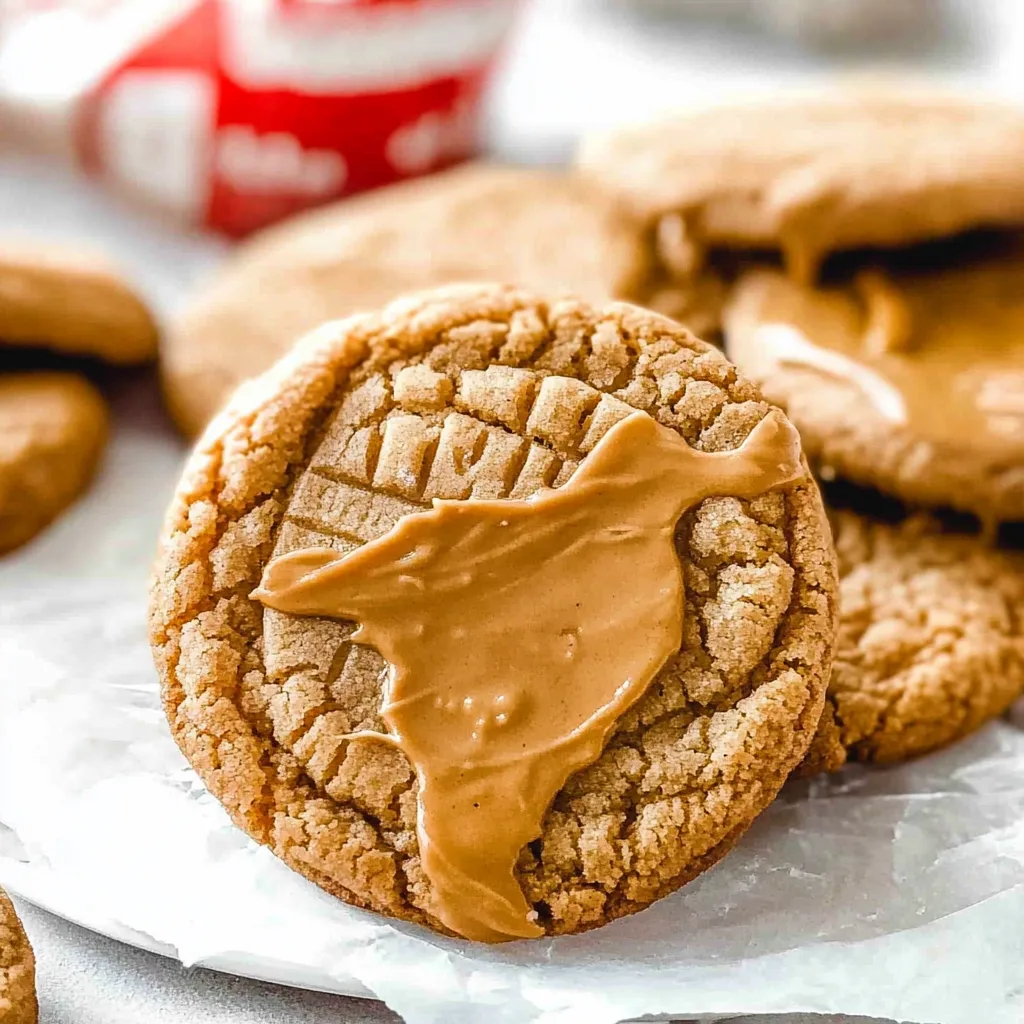
These Cookie Butter Cookies have become a regular rotation recipe in my house, as I make them almost every week because they’re so soft and chewy while packing just 120 calories each. The rich flavor of smooth cookie butter really sets these cookies apart from typical chocolate chip varieties, giving them a delightful twist that keeps everyone coming back for more. Give this one a try this week. I promise it’ll become a regular rotation treat in your house too.