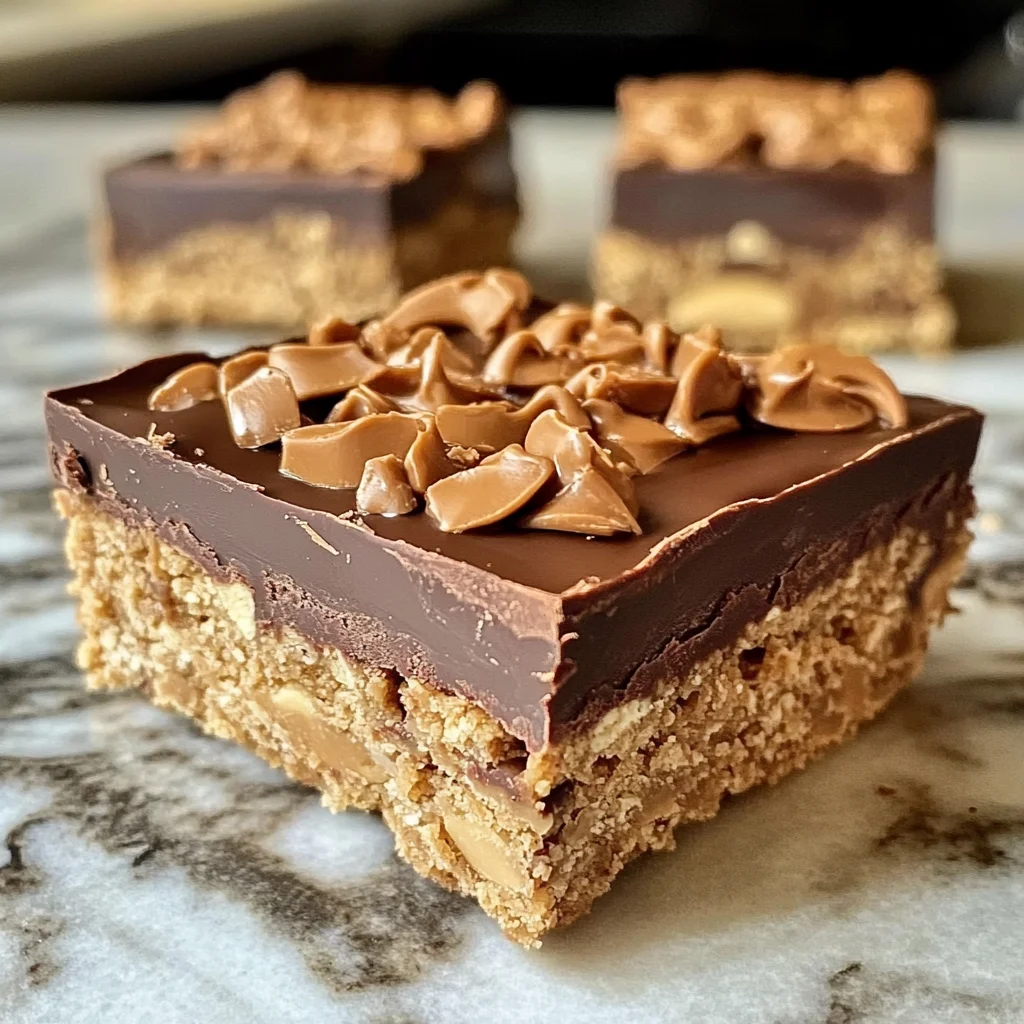
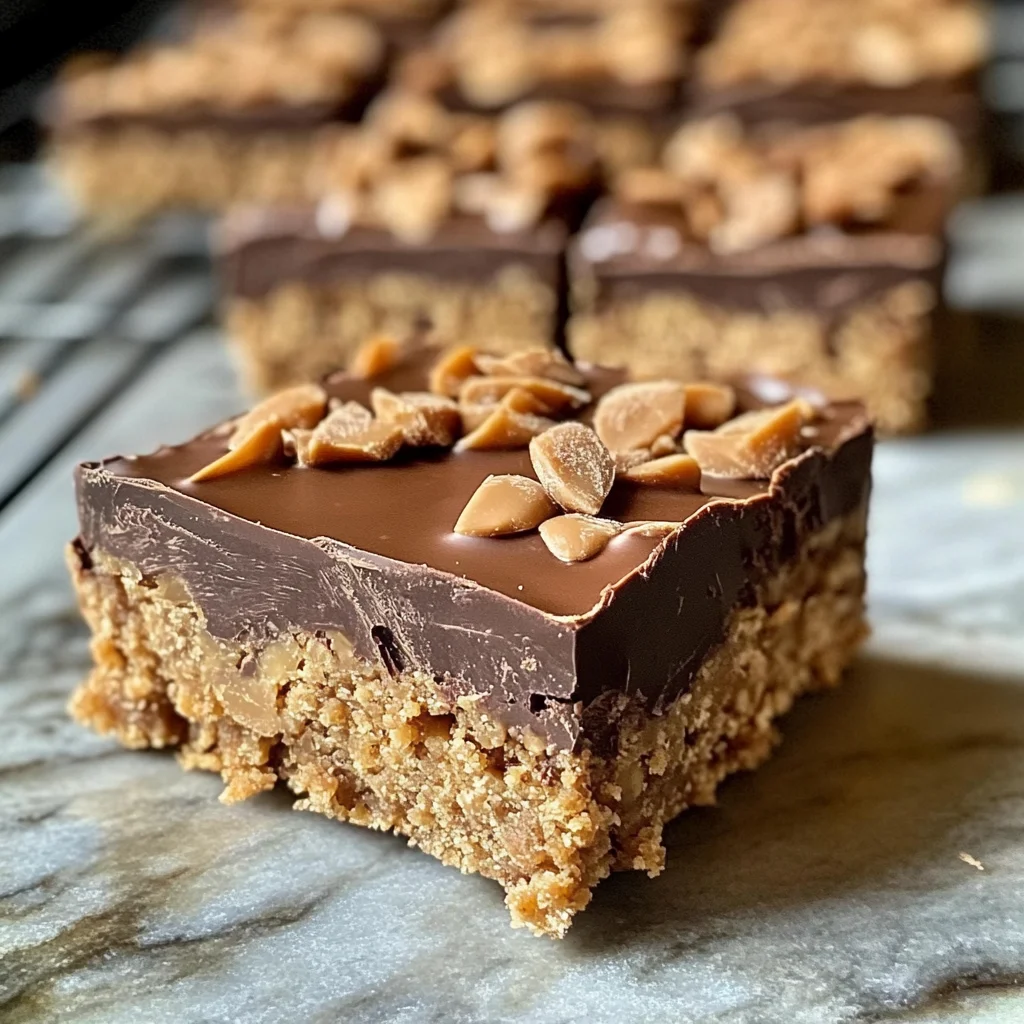
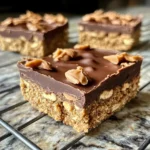
Reese’s Peanut Butter No-Bake Bars Recipe
If you’re looking for a dessert that is both delicious and easy to make, then you’ve landed in the right place! The Reese’s Peanut Butter No-Bake Bars Recipe is one of those treats that never fails to impress. With its rich peanut butter and chocolate layers, it’s a favorite in my home, perfect for busy weeknights or family gatherings. Best of all, there’s no oven required—just a little mixing and some time in the fridge!
These bars are not just about convenience; they carry a special nostalgia for me. I remember making them with my family during cozy nights in when we craved something sweet. Trust me, once you try this recipe, it will become a beloved staple in your household too!
Why You’ll Love This Recipe
- Easy to Make: With just a few simple steps, you’ll have these bars ready in no time!
- No Baking Required: Perfect for those hot days when you want something sweet without heating up the kitchen.
- Family-Friendly Treat: Kids love helping out with this recipe, and everyone enjoys the final result!
- Make-Ahead Convenience: Prepare these bars in advance and keep them chilled for whenever the craving strikes.
- Delicious Flavor: The combination of creamy peanut butter and rich chocolate is simply irresistible.
Ingredients You’ll Need
This recipe calls for simple, wholesome ingredients that are likely already in your pantry. Gather these goodies, and you’ll be on your way to creating a delightful treat!
- 1 cup (240g) creamy peanut butter
- 1 cup (225g) unsalted butter, melted
- 2 cups (250g) powdered sugar
- 2 cups (200g) grachicken chicken ham cracker crumbs
- 1½ cups (260g) semisweet chocolate chips
- ½ cup (120g) creamy peanut butter
Variations
One of the best parts about this Reese’s Peanut Butter No-Bake Bars Recipe is its flexibility. Feel free to get creative with your ingredients! Here are some fun ideas:
- Add Some Crunch: Mix in chopped nuts like peanuts or almonds for an extra crunch.
- Switch Up the Chocolate: Try using milk chocolate or dark chocolate chips for different flavor profiles.
- Make It Minty: Add a few drops of peppermint extract to the chocolate layer for a refreshing twist.
- Top It Off: Sprinkle some sea salt or crushed cookies on top before chilling for an extra touch.
How to Make Reese’s Peanut Butter No-Bake Bars Recipe
Step 1: Mix the Base
In a large mixing bowl, combine the melted butter, creamy peanut butter, powdered sugar, and grachicken chicken ham cracker crumbs. Stir until everything is well incorporated and smooth. This mixture forms the base of our bars and creates that wonderful peanut buttery goodness.
Step 2: Press into the Dish
Press the mixture evenly into the bottom of a 9×13-inch baking dish lined with parchment paper. This step is crucial as it helps create an even layer that will hold together nicely once chilled.
Step 3: Prepare the Chocolate Layer
In a microwave-safe bowl, add the semisweet chocolate chips and ½ cup of creamy peanut butter. Heat them in 30-second intervals, stirring between each until smooth and fully melted. Melting gently prevents burning and ensures a silky texture that will pour beautifully over your peanut butter layer.
Step 4: Spread It Out
Pour the melted chocolate mixture over the pressed peanut butter layer, spreading it evenly with a spatula. This step gives your bars that luscious chocolate topping we all crave!
Step 5: Chill Until Firm
Refrigerate your creation for at least 2 hours or until firm. This waiting time allows all those delicious flavors to meld together perfectly.
Step 6: Slice and Serve
Let your bars sit at room temperature for about 5 minutes before slicing. Cut them into squares or bars as desired and enjoy every bite of this delightful treat!
With this Reese’s Peanut Butter No-Bake Bars Recipe, you’re not just making dessert; you’re creating sweet memories!
Pro Tips for Making Reese’s Peanut Butter No-Bake Bars Recipe
Making these no-bake bars is a breeze, and with a few simple tips, you can elevate your treat to perfection!
- Use room temperature ingredients – Allowing your peanut butter and melted butter to cool slightly before mixing helps achieve a creamier texture that binds well.
- Pack the crust firmly – When pressing the mixture into the pan, use a flat measuring cup or spatula to pack it down tightly. This will prevent the bars from crumbling when cut.
- Choose high-quality chocolate chips – Opting for quality semisweet chocolate chips enhances the flavor and creates a smoother topping. Good chocolate makes all the difference!
- Chill longer for firmer bars – If you want extra-firm bars that hold their shape better, consider refrigerating them overnight. This allows all the flavors to meld beautifully.
- Experiment with mix-ins – Feel free to customize your bars by adding some chopped nuts, shredded coconut, or even a sprinkle of sea salt on top for a delightful contrast!
How to Serve Reese’s Peanut Butter No-Bake Bars Recipe
Presentation is key when serving these delicious bars. Here are some fun ideas to make them look as good as they taste!
Garnishes
- Chopped peanuts – Sprinkling some chopped peanuts over the top adds a crunchy texture and enhances the peanut flavor.
- Drizzle of chocolate – A light drizzle of melted chocolate over the cut bars not only looks stunning but also provides an extra layer of chocolaty goodness.
- Whipped coconut cream – Serve alongside a dollop of whipped coconut cream for a creamy contrast that complements the richness of the bars.
Side Dishes
- Fresh fruit salad – A refreshing fruit salad adds a burst of color and balances the sweetness of the bars with its natural acidity.
- Vanilla ice cream – Creamy vanilla ice cream pairs wonderfully with these rich treats, creating an indulgent dessert experience that everyone will love.
- Coffee or herbal tea – A warm cup of coffee or herbal tea can enhance the flavors of your dessert while providing a comforting touch to your serving experience.
- Chocolate-covered strawberries – These delightful bites make for an elegant pairing that complements the chocolatey elements in your no-bake bars.
Now that you’re equipped with tips and serving suggestions, get ready to enjoy these scrumptious Reese’s Peanut Butter No-Bake Bars! Happy baking!
Make Ahead and Storage
These Reese’s Peanut Butter No-Bake Bars are perfect for meal prep! You can whip them up ahead of time, making them a delightful treat ready to enjoy whenever you crave something sweet.
Storing Leftovers
- Store the bars in an airtight container in the refrigerator.
- They will stay fresh for up to one week.
- For best results, separate layers with parchment paper to prevent sticking.
Freezing
- Wrap each bar individually in plastic wrap or aluminum foil.
- Place wrapped bars in a freezer-safe container or bag for extra protection.
- They can be frozen for up to 3 months. Just thaw them in the fridge before enjoying!
Reheating
- These bars are best enjoyed cold or at room temperature.
- If you prefer a slightly warm treat, microwave for about 10-15 seconds to soften slightly.
FAQs
Here are some common questions about the Reese’s Peanut Butter No-Bake Bars Recipe:
Can I use natural peanut butter for this recipe?
Yes! You can use natural peanut butter, but make sure it is well-stirred and creamy for the best texture.
How long do Reese’s Peanut Butter No-Bake Bars last?
Reese’s Peanut Butter No-Bake Bars will last up to one week when stored properly in the refrigerator.
Can I modify this Reese’s Peanut Butter No-Bake Bars Recipe?
Absolutely! You can add crushed nuts, replace chocolate chips with white chocolate, or even mix in your favorite candies for a twist.
Are there any substitutes for graham cracker crumbs?
You can substitute graham cracker crumbs with crushed digestive biscuits or any other similar cookie crumbs you prefer.
Final Thoughts
I hope you find as much joy in making these Reese’s Peanut Butter No-Bake Bars as I do! They’re not just easy to prepare but also incredibly satisfying, bringing together that perfect balance of creamy peanut butter and rich chocolate. Whether you’re treating yourself or sharing with friends, these bars are sure to impress! Enjoy every bite and let your taste buds celebrate!
Reese’s Peanut Butter No-Bake Bars
Indulge in the delightful experience of making Reese’s Peanut Butter No-Bake Bars, a sweet treat that combines creamy peanut butter and rich chocolate without ever needing to turn on the oven. Perfect for those busy evenings or spontaneous family gatherings, these bars are a nostalgic favorite that everyone will love. The best part? They require minimal effort, simply mix, chill, and enjoy! With their luscious layers and easy preparation, they make for an ideal dessert that can be customized with your favorite add-ins. Whether you’re serving them at a party or enjoying them as a quick snack, these no-bake bars are sure to satisfy any sweet tooth craving.
- Prep Time: 15 minutes
- Cook Time: 0 minutes
- Total Time: 15 minutes
- Yield: Approximately 12 servings 1x
- Category: Dessert
- Method: No-Bake
- Cuisine: American
Ingredients
- 1 cup creamy peanut butter
- 1 cup unsalted butter, melted
- 2 cups powdered sugar
- 2 cups graham cracker crumbs
- 1½ cups semisweet chocolate chips
- ½ cup creamy peanut butter
Instructions
- In a large bowl, mix melted butter, creamy peanut butter, powdered sugar, and graham cracker crumbs until smooth.
- Press the mixture evenly into the bottom of a lined 9×13-inch baking dish.
- Melt chocolate chips and remaining peanut butter in intervals in the microwave until smooth; pour over the peanut butter base.
- Chill for at least 2 hours or until firm.
- Slice into squares or bars and serve.
Nutrition
- Serving Size: 1 serving
- Calories: 210
- Sugar: 12g
- Sodium: 85mg
- Fat: 14g
- Saturated Fat: 6g
- Unsaturated Fat: 7g
- Trans Fat: 0g
- Carbohydrates: 19g
- Fiber: 1g
- Protein: 3g
- Cholesterol: 20mg