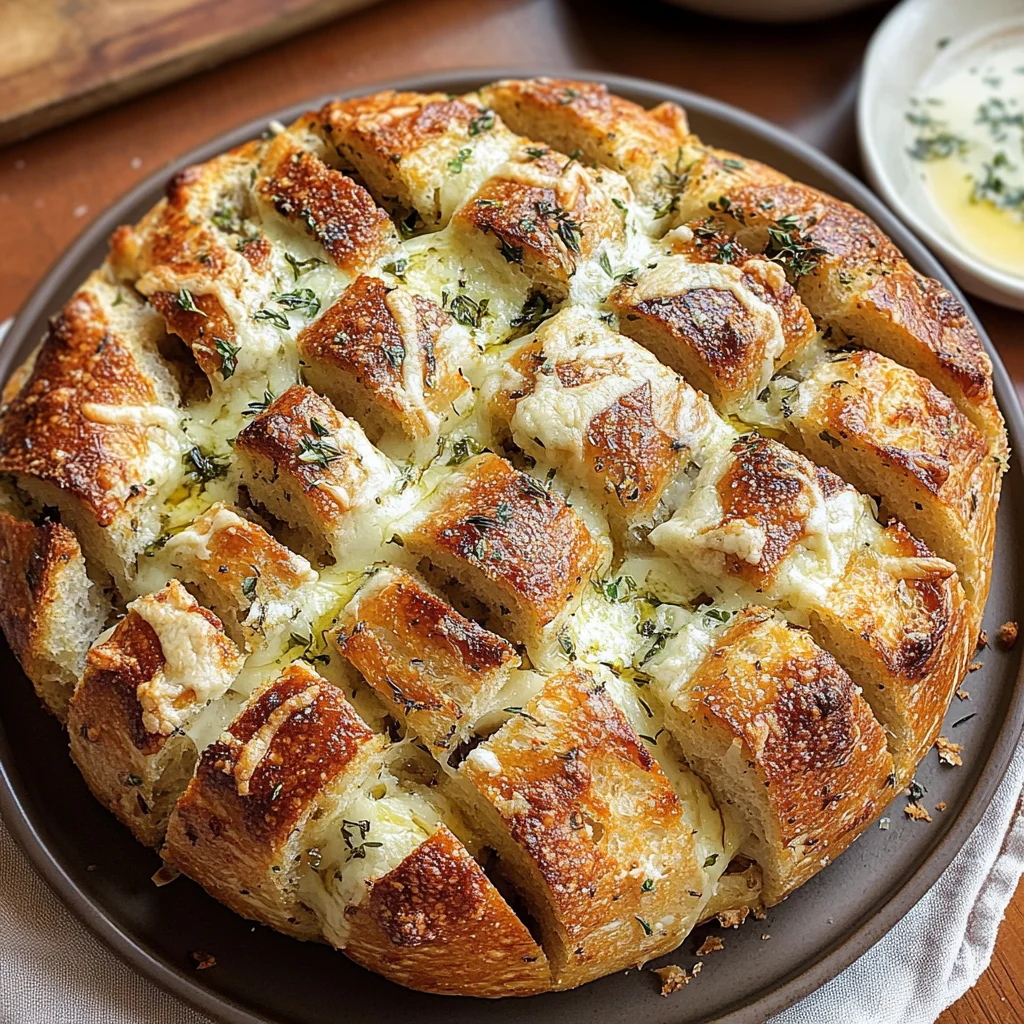
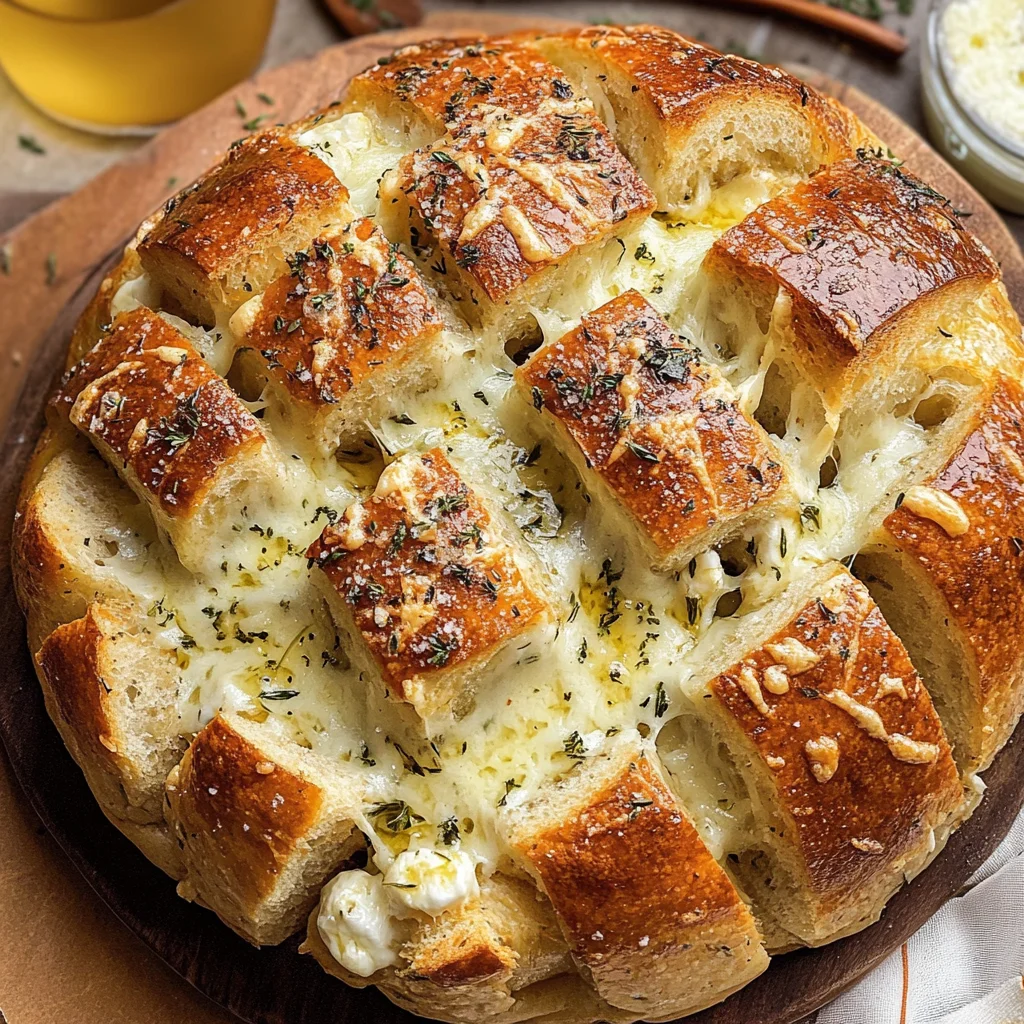
Pull Apart Garlic Bread Recipe
If you’re looking for a crowd-pleasing appetizer that will make your gatherings unforgettable, this Pull Apart Garlic Bread Recipe is just what you need. It’s one of those magical dishes that transforms a simple loaf into something truly special. Perfectly crusty on the outside and soft on the inside, every bite is bursting with a rich garlic flavor thanks to a delightful butter mixture. Whether it’s a busy weeknight dinner or a cozy family gathering, this recipe is sure to impress everyone at the table.
What I love most about this pull apart garlic bread recipe is its shareable nature. Friends can grab a piece as they mingle, making it an ideal addition to any occasion. Plus, it’s incredibly easy to prepare! You won’t have to spend hours in the kitchen, but you’ll still feel like a culinary rockstar when you serve it.
Why You’ll Love This Recipe
- Easy to make: With just a few simple steps, you’ll have delicious garlic bread ready in no time.
- Family-friendly: Kids and adults alike will devour this tasty treat—perfect for picky eaters!
- Make-ahead convenience: Prepare the garlic butter ahead of time and assemble just before baking.
- Customizable flavor: Mix in your favorite herbs or cheeses for a personal touch.
- Great for sharing: Its pull-apart design invites everyone to dig in together.
Ingredients You’ll Need
You won’t believe how simple and wholesome the ingredients are for this pull apart garlic bread recipe! Grab these goodies from your kitchen, and let’s get ready to whip up something truly scrumptious.
For the Bread
- 1 large round loaf of crusty bread (sourdough works great!)
For the Garlic Butter Mixture
- 1 cup (2 sticks) unsalted butter, softened
- 8 cloves of garlic (minced)
- 1/4 cup fresh parsley (finely chopped)
- 2 tablespoons fresh chives (finely chopped)
- 1/2 teaspoon salt
- 1/4 teaspoon black pepper
Optional Cheese Topping
- 1 cup shredded mozzarella or parmesan cheese
Variations
One of the best things about this recipe is its flexibility! Feel free to get creative and make it your own with these fun variations:
- Add some heat: Sprinkle in some red pepper flakes if you love a little kick.
- Herb it up: Swap out parsley and chives for other herbs like basil or thyme for different flavors.
- Cheesy goodness: Mix different types of cheese for an even richer taste—think cheddar or gouda!
- Stuff it with veggies: Layer in some roasted bell peppers or spinach between the cuts for extra nutrition.
How to Make Pull Apart Garlic Bread Recipe
Step 1: Preheat Your Oven
Before anything else, preheat your oven to 350°F (175°C). This step ensures that your garlic bread bakes evenly and becomes perfectly crispy!
Step 2: Prepare the Garlic Butter Mixture
In a bowl, mix together the softened butter, minced garlic, chopped parsley, chives, salt, and pepper until everything is well combined. This garlicky goodness is what brings all the flavor to your bread—it’s essential!
Step 3: Score the Bread
Take your loaf of bread and carefully make diagonal cuts across the top about 1 inch apart. Be gentle; you don’t want to cut all the way through the bottom crust. This scoring creates pockets for that luscious garlic butter!
Step 4: Create Crosshatch Cuts
Now rotate the loaf 90 degrees and make another series of diagonal cuts in the opposite direction. This crosshatch pattern not only looks beautiful but also allows all those flavors to seep deep into the bread.
Step 5: Spread That Garlicky Goodness
Using your fingers or a small spatula, gently spread the garlic butter mixture between each cut. Take your time here—it’s important to get that buttery flavor deep into those crevices!
Step 6: Cheese It Up (Optional)
If you’re opting for cheese, sprinkle it generously between those cuts as well. Who doesn’t love melty cheese? It adds an extra layer of deliciousness!
Step 7: Wrap It Up
Wrap your entire loaf in aluminum foil, leaving the top slightly open so it can crisp up nicely while baking.
Step 8: Bake Away!
Place your wrapped loaf on a baking sheet and pop it into your preheated oven for about 15-20 minutes. The aroma will start filling your kitchen—trust me; you’ll be tempted!
Step 9: Crisp It Up
After baking, unwrap the top of the foil and return it to the oven for an additional 5-10 minutes until it’s golden brown and crispy on top. This step is crucial for that irresistible crunch!
Step 10: Serve Warm
Once baked to perfection, remove from the oven and let cool for just a few minutes before serving warm. Grab some napkins—this pull apart garlic bread is meant for sharing! Enjoy every flavorful bite with friends and family!
Pro Tips for Making Pull Apart Garlic Bread Recipe
Creating the perfect pull apart garlic bread is a delightful experience, and a few simple tips can elevate your dish to new heights!
-
Choose the right bread: Opt for a sturdy, crusty loaf like sourdough or ciabatta. These types hold up well to the butter mixture and provide a satisfying crunch.
-
Use fresh garlic: Freshly minced garlic offers a more robust flavor compared to pre-minced or powdered options. The aromatic essence of fresh garlic infuses the butter beautifully.
-
Let it sit before serving: Allowing your garlic bread to rest for a few minutes after baking lets the flavors meld together and makes it easier to pull apart without losing ingredients.
-
Experiment with herbs: While parsley and chives are classic choices, don’t hesitate to add other herbs like thyme or basil. They can bring an exciting twist and enhance the overall flavor profile.
-
Adjust cheese quantity: If you love cheese, feel free to be generous! A little extra mozzarella or parmesan adds a gooey texture that complements the garlicky goodness perfectly.
How to Serve Pull Apart Garlic Bread Recipe
Serving your pull apart garlic bread is just as fun as making it! Here are some creative ideas on how to present this crowd-pleaser at your next gathering.
Garnishes
- Fresh herbs: Sprinkle some additional chopped parsley or chives over the top just before serving for a pop of color and freshness.
- Red pepper flakes: For those who enjoy a bit of heat, offer red pepper flakes on the side so guests can sprinkle them over their pieces for an added kick.
Side Dishes
- Salad: A light garden salad with mixed greens, cherry tomatoes, and a tangy vinaigrette pairs wonderfully with the richness of the bread.
- Soup: Serve alongside a warm bowl of tomato basil soup or creamy mushroom soup for a comforting combination that’s perfect for chilly evenings.
- Roasted vegetables: A medley of roasted seasonal vegetables adds nutrition and color to your table while complementing the savory flavors of the garlic bread.
- Dipping sauces: Provide marinara sauce or pesto for dipping. These sauces not only enhance the flavor but also make for an interactive dining experience!
Enjoy every bite of this delightful pull apart garlic bread recipe, whether as an appetizer or alongside your favorite meal!
Make Ahead and Storage
This Pull Apart Garlic Bread recipe is perfect for meal prep! You can prepare it ahead of time, making it an ideal choice for gatherings or busy weeknights. Here’s how to store and reheat your delicious creation.
Storing Leftovers
- Allow the garlic bread to cool completely before storing.
- Wrap any leftover bread tightly in plastic wrap or aluminum foil to keep it fresh.
- Place the wrapped bread in an airtight container or a resealable bag for added protection.
- Store in the refrigerator for up to 3 days.
Freezing
- Prepare the garlic bread as directed but do not bake it.
- Wrap the unbaked loaf tightly in plastic wrap and then in aluminum foil to prevent freezer burn.
- Label with the date and freeze for up to 3 months.
- When ready to bake, thaw in the refrigerator overnight before following the baking instructions.
Reheating
- Preheat your oven to 350°F (175°C).
- If refrigerated, unwrap the garlic bread and place it on a baking sheet.
- Bake for about 10-15 minutes until heated through.
- For frozen bread, unwrap and bake directly from the freezer, adding an extra 5-10 minutes to the baking time.
FAQs
If you have questions about this recipe, you’re not alone! Here are some common queries answered.
Can I make this Pull Apart Garlic Bread Recipe without cheese?
Absolutely! The garlic butter mixture is flavorful enough on its own, but feel free to omit cheese if you prefer.
How do I achieve a crispy top with my Pull Apart Garlic Bread Recipe?
Wrapping your garlic bread loosely in foil while baking helps steam it, while uncovering it towards the end allows for that perfect crispy finish.
Can I use different herbs in my Pull Apart Garlic Bread Recipe?
Certainly! You can experiment with various herbs such as thyme or oregano for a unique flavor twist.
Is there a gluten-free option for this Pull Apart Garlic Bread Recipe?
Yes! You can use a gluten-free crusty loaf available at most grocery stores. Just ensure all ingredients used are gluten-free as well.
How should I serve Pull Apart Garlic Bread?
This recipe is fantastic served warm as an appetizer or alongside pasta dishes, soups, or salads. Don’t forget the dipping sauces!
Final Thoughts
I hope you find joy in making this Pull Apart Garlic Bread recipe! It’s a delightful blend of flavors that brings everyone together around the table. Whether it’s game night or a cozy family dinner, this dish is sure to impress. Enjoy every pull-apart bite and don’t hesitate to share your experience with me; I’d love to hear how it turned out!
Pull Apart Garlic Bread
Looking for the perfect appetizer that combines simplicity and flavor? This Pull Apart Garlic Bread Recipe is your answer! With a crusty exterior and a soft, buttery interior infused with rich garlic goodness, this bread is a crowd-pleaser at any gathering. It’s incredibly easy to prepare, allowing you to whip it up in no time while impressing your guests. The shareable design invites everyone to dig in, making it ideal for family dinners, parties, or cozy evenings at home. Customize with your favorite herbs or cheese to make it uniquely yours. Get ready to enjoy every delicious bite!
- Prep Time: 15 minutes
- Cook Time: 30 minutes
- Total Time: 45 minutes
- Yield: Serves approximately 8 people 1x
- Category: Appetizer
- Method: Baking
- Cuisine: American
Ingredients
- 1 large round loaf of crusty bread (sourdough recommended)
- 1 cup unsalted butter, softened
- 8 cloves garlic, minced
- 1/4 cup fresh parsley, finely chopped
- 2 tablespoons fresh chives, finely chopped
- 1/2 teaspoon salt
- 1/4 teaspoon black pepper
- Optional: 1 cup shredded mozzarella or parmesan cheese
Instructions
- Preheat your oven to 350°F (175°C).
- In a bowl, combine softened butter, minced garlic, parsley, chives, salt, and pepper.
- Score the loaf with diagonal cuts about 1 inch apart without cutting through the bottom.
- Create crosshatch cuts by rotating the loaf and making diagonal cuts in the opposite direction.
- Spread the garlic butter mixture between each cut.
- If using cheese, sprinkle it generously between the cuts.
- Wrap the loaf in aluminum foil with the top slightly open.
- Bake on a baking sheet for 15-20 minutes; then uncover and bake for an additional 5-10 minutes until crispy.
- Let cool slightly before serving warm.
Nutrition
- Serving Size: 1 piece (about 50g)
- Calories: 210
- Sugar: 0g
- Sodium: 320mg
- Fat: 18g
- Saturated Fat: 11g
- Unsaturated Fat: 6g
- Trans Fat: 0g
- Carbohydrates: 14g
- Fiber: 1g
- Protein: 3g
- Cholesterol: 30mg