Pumpkin Oreo Balls
If you’re looking for a delightful treat that captures the essence of fall, look no further than these Pumpkin Oreo Balls! They are so easy to make and bursting with flavor, making them a favorite in my kitchen. These little bites of joy not only satisfy your sweet tooth but also bring a festive touch to any gathering. Whether it’s a busy weeknight or a cozy family get-together, these no-bake treats are perfect for sharing—or keeping all to yourself!
What makes this recipe extra special is how simple it is. With just a handful of ingredients and minimal effort, you’ll have a dessert that’s sure to impress everyone. Plus, their cute pumpkin design makes them an adorable addition to your autumn festivities!
Why You’ll Love This Recipe
- Quick and Easy: With minimal prep time and no baking required, you can whip these up in no time!
- Family-Friendly Fun: Kids love helping out with the decorating, making it an enjoyable activity for all ages.
- Perfect for Any Occasion: Whether it’s Halloween, Thanksgiving, or just because, these treats fit right in.
- Deliciously Wholesome: The combination of creamy cheese and crunchy Oreos creates a flavor that everyone will adore.
- Make Ahead Convenience: They store well in the fridge, so you can prepare them ahead of time and enjoy them later.
Ingredients You’ll Need
These Pumpkin Oreo Balls are made with simple, wholesome ingredients that you likely already have on hand. Let’s gather everything we need to create this delicious treat!
For the Pumpkin Oreo Balls
- 36 Oreo cookies
- 8 oz cream cheese (softened)
- 12 oz orange candy melts
Variations
This recipe is wonderfully flexible! Feel free to mix things up based on your preferences or what you have on hand.
- Switch up the coating: Use white chocolate or dark chocolate instead of orange candy melts for a different flavor.
- Add some spice: Mix in a pinch of cinnamon or nutmeg with the cream cheese for an extra autumnal twist.
- Try different decorations: Instead of pretzel sticks, use candy corn or mini chocolate chips for toppings.
- Make it gluten-free: Substitute gluten-free cookies to accommodate dietary needs without losing any flavor.
How to Make Pumpkin Oreo Balls
Step 1: Crush the Oreos
Start by pulsing the Oreo cookies in a food processor until they are finely crumbled. This step is crucial because it allows the cookies to blend seamlessly with the cream cheese, creating that deliciously smooth texture we love.
Step 2: Mix in Cream Cheese
Next, mix in the softened cream cheese until everything is well combined. This is where the magic happens! The cream cheese adds richness and binds everything together perfectly.
Step 3: Shape Into Balls
Using a scoop or your hands, form the mixture into 1-inch balls and place them on a parchment-covered baking sheet. Refrigerate them for about 15 minutes. Chilling helps them hold their shape when dipping into chocolate.
Step 4: Create Pumpkin Lines
After chilling, use a toothpick to gently score lines into each ball to resemble pumpkins. This fun little detail will give your treats that festive pumpkin look!
Step 5: Melt Your Coating
While your balls chill again (for about 10 minutes), melt the orange candy wafers over a double boiler or in the microwave according to package directions. Melting them properly ensures they coat smoothly.
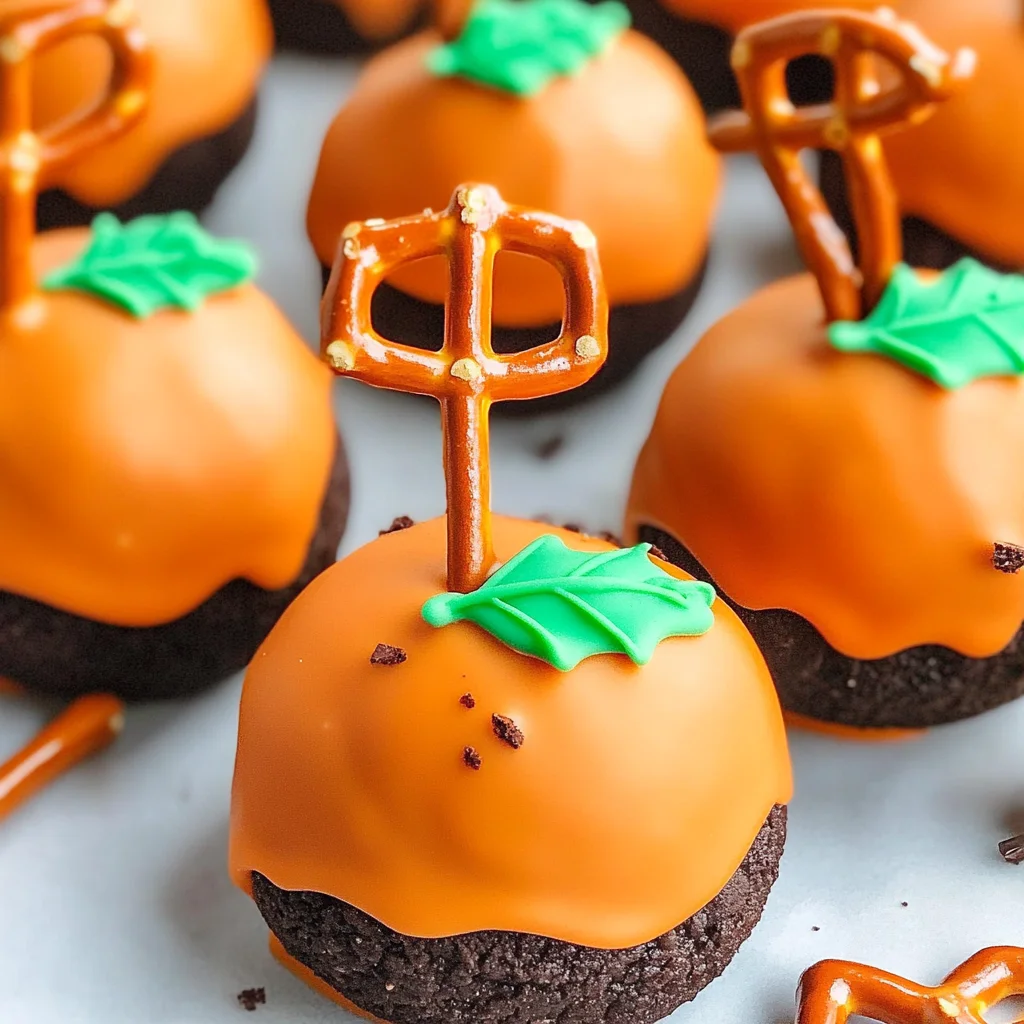
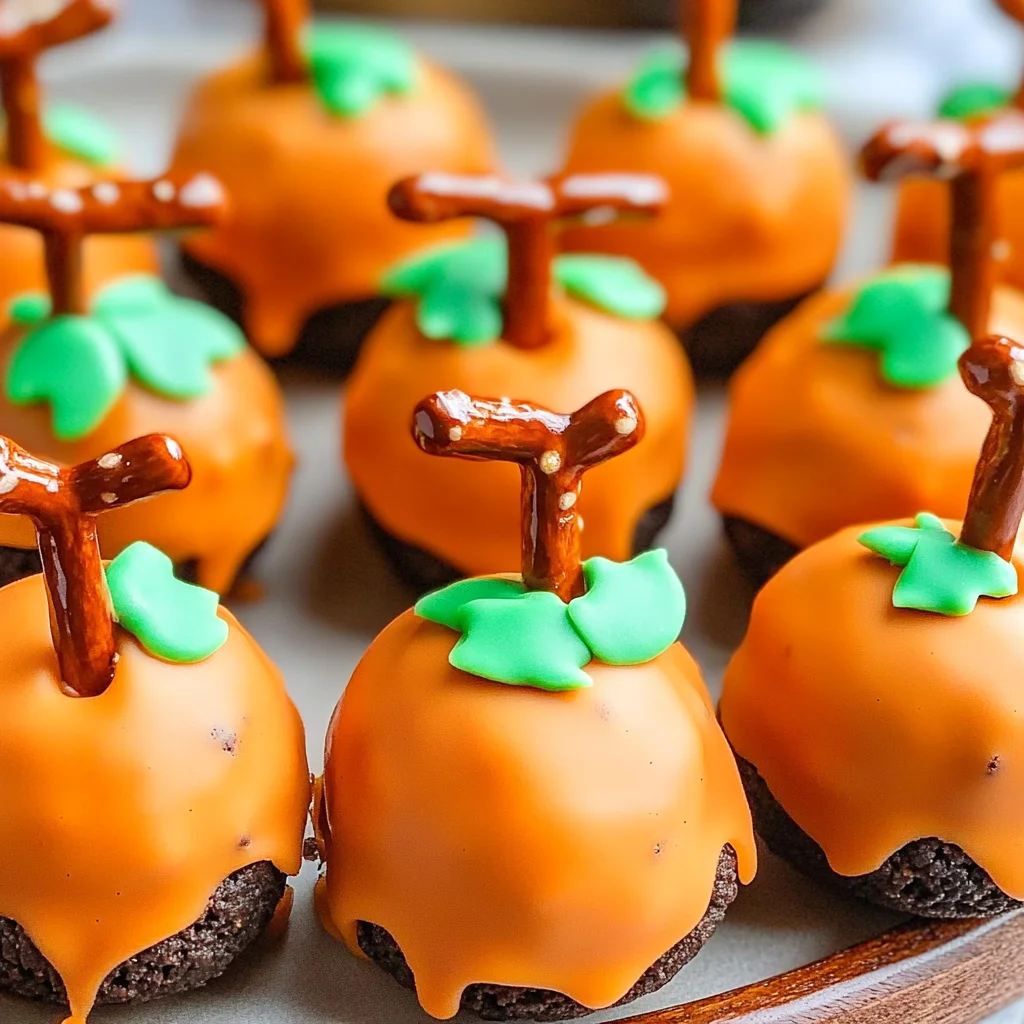
Step 6: Dip and Decorate
Dip each pumpkin Oreo ball into the melted chocolate, shaking off any excess. Place them back onto the lined baking sheet and quickly add a small pretzel stick to resemble a stem along with green leaf icing decorations. The quick addition while the chocolate is still warm helps everything stick beautifully!
Step 7: Chill Again
Finally, refrigerate until ready to serve. This will set the chocolate perfectly and ensure every bite is cold and refreshing when enjoyed!
Enjoy these delightful Pumpkin Oreo Balls at your next gathering or as a sweet treat at home—you deserve it!
Pro Tips for Making Pumpkin Oreo Balls
Making Pumpkin Oreo Balls is a delightful experience, and with these handy tips, you can ensure they turn out perfectly every time!
- Use room temperature cream cheese: This helps the mixture blend more smoothly with the crushed Oreos, creating a creamy texture that’s easier to roll into balls.
- Chill your dough: After forming the balls, chilling them for a bit before dipping in chocolate solidifies their shape and makes handling them easier.
- Work quickly when coating: Once you dip the balls in melted chocolate, work swiftly to decorate before the chocolate sets. This ensures your pretzel sticks and icing decorations stick perfectly.
- Adjust the sweetness: If you prefer a less sweet treat, consider using less cream cheese or opting for a darker chocolate coating for contrast.
- Experiment with flavors: Feel free to add spices like cinnamon or nutmeg to the cream cheese mixture for an extra flavor kick that brings out that fall vibe.
How to Serve Pumpkin Oreo Balls
These cute little pumpkin treats can be presented in many fun ways! Whether you’re hosting a fall gathering or celebrating Halloween, here are some ideas to make your Pumpkin Oreo Balls shine.
Garnishes
- Sprinkle of edible glitter: A light dusting of edible glitter can give your pumpkin balls a magical touch, making them even more appealing at parties.
- Chopped nuts: Finely chopped walnuts or pecans can add a nice crunch and complement the creamy filling beautifully.
- Cocoa powder dusting: Lightly dusting with cocoa powder can provide an elegant finish while enhancing the chocolate flavor.
Side Dishes
- Apple slices with caramel dip: Crisp apple slices paired with rich caramel create a sweet and tangy contrast that balances well with the sweetness of the pumpkin Oreo balls.
- Pumpkin spice popcorn: Fluffy popcorn coated in pumpkin spice seasoning offers a crunchy snack that ties in nicely with the pumpkin theme.
- Cheese platter: A selection of cheeses—such as sharp cheddar and creamy brie—alongside some crackers provides savory bites that complement the sweetness of dessert.
- Warm spiced cider: Serving this warm beverage alongside your treats creates that cozy autumn atmosphere everyone loves.
With these tips and serving suggestions, your Pumpkin Oreo Balls are sure to be a crowd-pleaser at any event! Enjoy every bite!
Make Ahead and Storage
These Pumpkin Oreo Balls are perfect for meal prep! You can whip them up ahead of time for parties, gatherings, or just to satisfy your sweet tooth throughout the week.
Storing Leftovers
- Store any leftover Pumpkin Oreo Balls in an airtight container in the refrigerator.
- They will stay fresh for up to one week.
- If you want to keep them longer, consider freezing them (see below).
Freezing
- To freeze, place the Pumpkin Oreo Balls in a single layer on a baking sheet and freeze until solid.
- Once frozen, transfer them to a freezer-safe container or resealable bag, separating layers with parchment paper.
- They can be stored in the freezer for up to three months.
Reheating
- There’s no need to reheat these tasty treats; simply enjoy them cold or at room temperature!
- If you prefer them slightly warm, let them sit out for about 10-15 minutes before serving.
FAQs
Have questions? Don’t worry, I’ve got you covered!
Can I make these Pumpkin Oreo Balls gluten-free?
Absolutely! Just use gluten-free Oreo cookies, and you’ll have a delicious gluten-free treat that everyone can enjoy.
How do I decorate my Pumpkin Oreo Balls?
You can get creative! Use pretzel sticks for the stems and green icing or fondant for leaves. Feel free to add sprinkles or other fun decorations too!
What makes these Pumpkin Oreo Balls so special?
These Pumpkin Oreo Balls combine the rich flavors of chocolate and pumpkin spice, making them a delightful fall treat that’s perfect for gatherings and celebrations.
Final Thoughts
I hope you love making these delightful Pumpkin Oreo Balls as much as I do! They’re not only simple to prepare but also bring a festive touch to any occasion. Enjoy every bite and don’t forget to share them with friends and family. Happy baking!
Pumpkin Oreo Balls

Indulge in the joy of fall with these delightful Pumpkin Oreo Balls! These no-bake treats are incredibly easy to prepare, making them the perfect sweet addition to any gathering. With a creamy filling made from crushed Oreo cookies and cream cheese, coated in bright orange candy melts, they not only taste amazing but also look adorable as festive pumpkin bites. Whether you’re celebrating Halloween, Thanksgiving, or simply enjoying a cozy evening at home, these treats are sure to impress. Plus, they’re kid-friendly and make for a fun baking activity that everyone can enjoy!
- Prep Time: 20 minutes
- Cook Time: 0 minutes
- Total Time: 20 minutes
- Yield: Approximately 18 servings 1x
- Category: Dessert
- Method: No-bake
- Cuisine: American
Ingredients
- 36 Oreo cookies
- 8 oz cream cheese (softened)
- 12 oz orange candy melts
Instructions
- Crush the Oreo cookies in a food processor until finely crumbled.
- Mix in the softened cream cheese until well combined.
- Form the mixture into 1-inch balls and place them on a parchment-covered baking sheet. Refrigerate for 15 minutes.
- Use a toothpick to score lines on each ball to create a pumpkin design.
- Melt the orange candy melts according to package instructions.
- Dip each ball into the melted candy, shaking off excess, and quickly add a pretzel stick for a stem and green icing for leaves.
- Chill again until set.
Nutrition
- Serving Size: 1 ball (30g)
- Calories: 150
- Sugar: 14g
- Sodium: 70mg
- Fat: 7g
- Saturated Fat: 4g
- Unsaturated Fat: 2g
- Trans Fat: 0g
- Carbohydrates: 20g
- Fiber: 0g
- Protein: 1g
- Cholesterol: 20mg