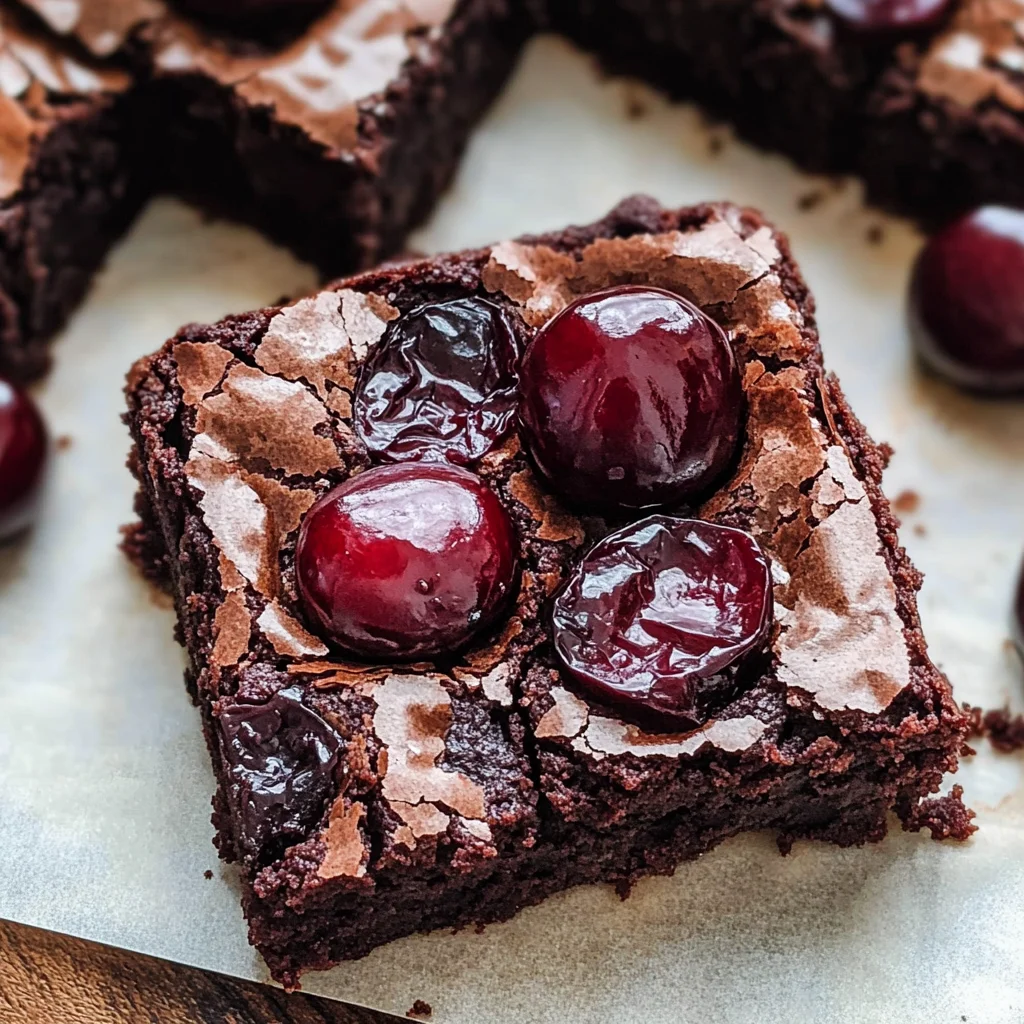
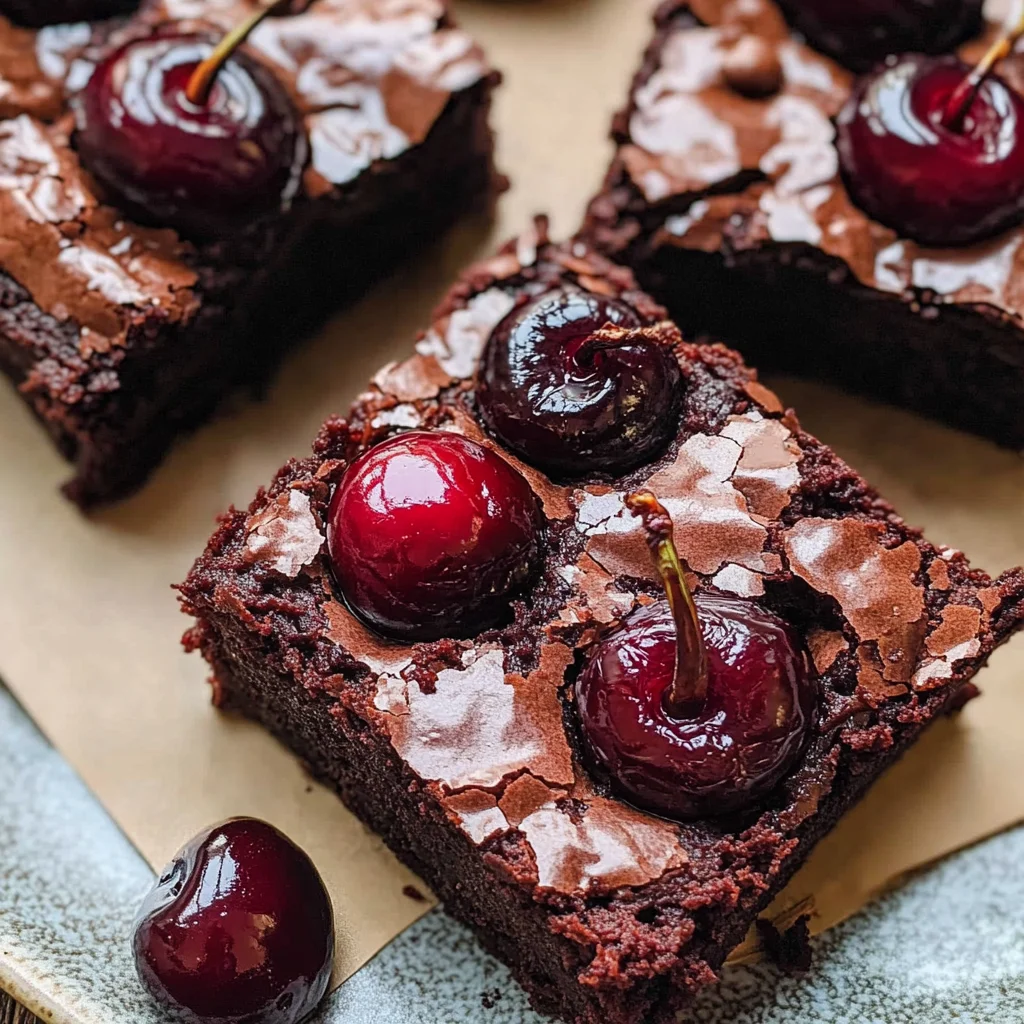
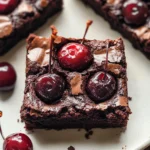
Roasted Chocolate Cherry Brownies
If you’re looking for the perfect dessert to impress your friends and family, look no further than these delightful Roasted Chocolate Cherry Brownies! There’s something truly magical about the combination of rich chocolate and sweet, roasted cherries that just makes my heart sing. These brownies are not only fudgy and indulgent, but they also bring a burst of fruity flavor that takes them to the next level. Perfect for busy weeknights or family gatherings, they are sure to leave everyone asking for seconds!
What makes this recipe even more special is how easy it is to whip up a batch. With simple steps and wholesome ingredients, you’ll be enjoying these decadent treats in no time. So grab your mixing bowl and let’s get started on making some unforgettable Roasted Chocolate Cherry Brownies!
Why You’ll Love This Recipe
- Easily Whipped Up: With just a handful of ingredients and straightforward steps, you can create a delicious treat without spending hours in the kitchen.
- Fudgy Goodness: These brownies have the perfect rich texture that melts in your mouth, making them an absolute crowd-pleaser.
- Fruitful Twist: The roasted cherries add a lovely sweetness that balances the chocolate beautifully—it’s like a party for your taste buds!
- Perfect for Any Occasion: Whether it’s a cozy evening at home or a birthday celebration, these brownies fit right in.
- Make Ahead: You can bake them in advance and store them for later, which means you’ll always have a tasty dessert on hand.
Ingredients You’ll Need
Gathering your ingredients is half the fun! For these Roasted Chocolate Cherry Brownies, you’ll need simple and wholesome items that come together to create magic in your oven. Here’s what you’ll need:
For the Roasted Cherries
- 2 cups Cherries cut in half (washed, pitted)
- Sprinkle of sugar
For the Brownie Batter
- 1 1/3 cup White granulated sugar
- 2 Large eggs
- 1 Egg yolk
- 5 TBSP Unsalted butter (melted)
- 1/3 cup Oil (canola or vegetable)
- 1 tsp Pure vanilla extract
- 3/4 cup All-purpose flour
- 3/4 cup Dutch process cocoa powder
- 1 TBSP Cornstarch
- 1 tsp Salt
- 1 cup Semi-sweet chocolate chips
Variations
One of the best things about baking is how flexible recipes can be! Feel free to play around with these variations to make this recipe your own:
- Add Nuts: Toss in some chopped walnuts or pecans for added crunch and flavor.
- Use Different Fruit: Substitute with raspberries or blueberries for a different fruity twist that pairs wonderfully with chocolate.
- Make it Gluten-Free: Swap out all-purpose flour with gluten-free flour blend to cater to dietary needs.
- Mix in Extracts: Experiment with different extracts like almond or orange for an exciting flavor profile.
How to Make Roasted Chocolate Cherry Brownies
Step 1: Roast the Cherries
Preheat your oven to 400°F. Line a baking sheet with parchment paper and spread those luscious cherry halves over it. Sprinkle them with sugar before popping them into the oven for about 10 minutes. This step is essential as roasting brings out their natural sweetness, creating an incredible topping for our brownies.
Step 2: Prepare the Baking Pan
Once those cherries are done roasting, lower your oven temperature to 325°F. Grab an 8×8 pan and spray it with non-stick baking spray. Line the bottom and two sides with parchment paper for easy brownie removal later on—trust me; this will save you from any sticky situations!
Step 3: Mix Dry Ingredients
In a mixing bowl, sift together the flour, cocoa powder, cornstarch, and salt. Setting this aside while we whip up our wet ingredients ensures everything mixes smoothly later on.
Step 4: Beat Sugar and Eggs
Using a mixer fitted with a whisk attachment, beat together the granulated sugar, eggs, and egg yolk on high speed for about five minutes until it’s light and fluffy. This is what gives our brownies that signature fudgy texture!
Step 5: Combine Wet Ingredients
While that’s mixing away, melt your butter until it’s slightly cool. Add in this melted butter along with oil and vanilla extract into your egg mixture on low speed. Then gently fold in those dry ingredients using a rubber spatula—be careful not to deflate all that lovely air we’ve beaten in!
Step 6: Fold in Cherries & Chocolate Chips
Take half of those gorgeous roasted cherries and fold them into your brownie batter along with semi-sweet chocolate chips. Mixing these in adds bursts of flavor throughout each bite!
Step 7: Bake & Cool
Pour that heavenly brownie batter into your prepared pan and smooth it out evenly. Bake for about 40-50 minutes until edges are set but the middle remains slightly underdone (this keeps it gooey!). Once done, sprinkle some extra chocolate chips on top before letting it cool completely.
Step 8: Chill & Serve
For an extra treat, pop those brownies into the freezer for about 15 minutes after they’ve cooled down—this helps achieve cleaner cuts when serving! Finally, top them off with remaining roasted cherries before slicing into squares to share (or keep all to yourself—no judgment here!).
Enjoy every last bite of these delightful Roasted Chocolate Cherry Brownies!
Pro Tips for Making Roasted Chocolate Cherry Brownies
Baking these delightful brownies is a joy, and with a few pro tips, you can ensure they turn out perfectly every time!
-
Use room temperature eggs: Bringing your eggs to room temperature helps them incorporate better into the batter, resulting in a smoother and more evenly textured brownie.
-
Don’t overmix the batter: Gently folding in the dry ingredients keeps the air bubbles intact, which contributes to that luscious fudgy texture we all love in brownies.
-
Check for doneness with a toothpick: When inserting a toothpick into the center of the brownies, it should come out with a few moist crumbs attached. This indicates that they are perfectly baked but still wonderfully gooey.
-
Let them cool completely: Allowing your brownies to cool in the pan before cutting helps them set properly and makes slicing much easier without crumbling.
-
Experiment with chocolate chips: Feel free to substitute semi-sweet chips with dark or even white chocolate for an exciting twist on flavor that complements the cherries beautifully.
How to Serve Roasted Chocolate Cherry Brownies
These Roasted Chocolate Cherry Brownies are not only delicious but also visually stunning. Presenting them beautifully can elevate your dessert experience!
Garnishes
- Fresh mint leaves: A few sprigs of mint add a refreshing touch and contrast beautifully with the rich chocolate flavor.
- Powdered sugar dusting: A light sprinkle of powdered sugar on top can create an elegant finish and make the brownies look extra appealing.
- Chocolate drizzle: Melt some extra chocolate and drizzle it over the top for a decadent touch that enhances both flavor and presentation.
Side Dishes
- Vanilla ice cream: The creamy sweetness of vanilla ice cream pairs perfectly with the fudgy brownies, offering a delightful contrast in texture.
- Whipped coconut cream: For a dairy-free option, whipped coconut cream adds a light and airy element that balances out the richness of the brownies.
- Fresh fruit salad: A medley of fresh fruits provides a refreshing side that complements the chocolate cherry flavor while adding vibrant colors to your plate.
- Coffee or espresso: A warm cup of coffee or espresso can enhance the deep flavors of chocolate while providing a delightful after-dinner treat alongside your brownies.
Enjoy serving these delicious treats to friends and family—they’re sure to be a hit!
Make Ahead and Storage
These Roasted Chocolate Cherry Brownies are perfect for meal prep! You can make a batch ahead of time and enjoy them throughout the week. They store beautifully and maintain their fudgy texture, making them an excellent treat for busy days.
Storing Leftovers
- Store brownies in an airtight container at room temperature for up to 3 days.
- For longer freshness, refrigerate them, where they can last up to a week.
- If you prefer, layer the brownies with parchment paper to prevent sticking.
Freezing
- Wrap individual brownies tightly in plastic wrap or aluminum foil.
- Place wrapped brownies in a freezer-safe bag or container.
- They can be frozen for up to 3 months. Thaw at room temperature before enjoying.
Reheating
- For a warm treat, microwave a brownie for about 10-15 seconds.
- Alternatively, reheat in an oven at 350°F (175°C) for about 5 minutes until warmed through.
FAQs
Here are some common questions about Roasted Chocolate Cherry Brownies!
Can I use frozen cherries for Roasted Chocolate Cherry Brownies?
Yes! Frozen cherries work well too. Just thaw and drain them before using to avoid excess moisture in the brownies.
How do Roasted Chocolate Cherry Brownies differ from regular brownies?
Roasted Chocolate Cherry Brownies have a richer flavor thanks to the roasted cherries that add sweetness and depth, making them extra special compared to standard brownies.
What should I do if my brownies are too dry?
If your brownies turn out dry, they may have been overbaked. Keep an eye on them towards the end of baking time and remember that they will continue cooking slightly as they cool.
Can I customize the chocolate in Roasted Chocolate Cherry Brownies?
Absolutely! You can substitute semi-sweet chocolate chips with dark chocolate or milk chocolate based on your preference.
Final Thoughts
I hope you enjoy making these Roasted Chocolate Cherry Brownies as much as I do! Their rich chocolate flavor combined with sweet roasted cherries makes them truly special. Don’t hesitate to share these with friends or keep them all to yourself—they’re that good! Happy baking!
Roasted Chocolate Cherry Brownies
Indulge in the delightful combination of rich chocolate and sweet roasted cherries with these Roasted Chocolate Cherry Brownies. This easy-to-make dessert is a perfect treat for any occasion, from cozy evenings at home to festive gatherings. Each fudgy brownie is infused with bursts of fruity flavor that beautifully complement the deep chocolate richness, ensuring every bite is a heavenly experience. With simple ingredients and straightforward steps, you’ll have these crowd-pleasing brownies ready in no time. Whether served as an afternoon snack or a decadent dessert, these brownies are bound to impress your friends and family.
- Prep Time: 20 minutes
- Cook Time: 50 minutes
- Total Time: 1 hour 10 minutes
- Yield: Approximately 16 servings 1x
- Category: Dessert
- Method: Baking
- Cuisine: American
Ingredients
- 2 cups cherries, halved and pitted
- 1 1/3 cups white granulated sugar
- 2 large eggs
- 1 egg yolk
- 5 tbsp unsalted butter, melted
- 1/3 cup canola or vegetable oil
- 1 tsp pure vanilla extract
- 3/4 cup all-purpose flour
- 3/4 cup Dutch process cocoa powder
- 1 tbsp cornstarch
- 1 tsp salt
- 1 cup semi-sweet chocolate chips
Instructions
- Preheat oven to 400°F. Line a baking sheet with parchment paper, spread cherry halves on it, sprinkle with sugar, and roast for about 10 minutes.
- Lower oven temperature to 325°F. Prepare an 8×8 baking pan by spraying with non-stick spray and lining it with parchment paper.
- In a bowl, sift together flour, cocoa powder, cornstarch, and salt; set aside.
- Beat sugar, eggs, and egg yolk with a mixer until light and fluffy (about five minutes).
- Add melted butter, oil, and vanilla to the egg mixture on low speed. Gently fold in dry ingredients using a rubber spatula.
- Fold in half of the roasted cherries and chocolate chips.
- Pour batter into the prepared pan, smooth out evenly, and bake for 40-50 minutes until edges are set but center remains slightly underdone.
- Let cool completely before slicing into squares.
Nutrition
- Serving Size: 1 brownie (40g)
- Calories: 185
- Sugar: 14g
- Sodium: 70mg
- Fat: 8g
- Saturated Fat: 3g
- Unsaturated Fat: 4g
- Trans Fat: 0g
- Carbohydrates: 27g
- Fiber: 2g
- Protein: 2g
- Cholesterol: 30mg