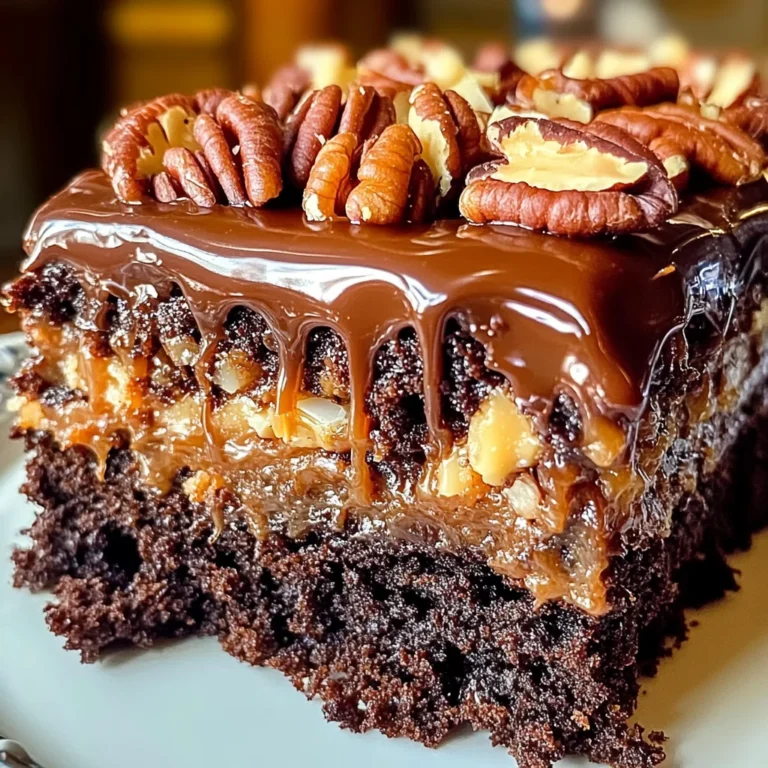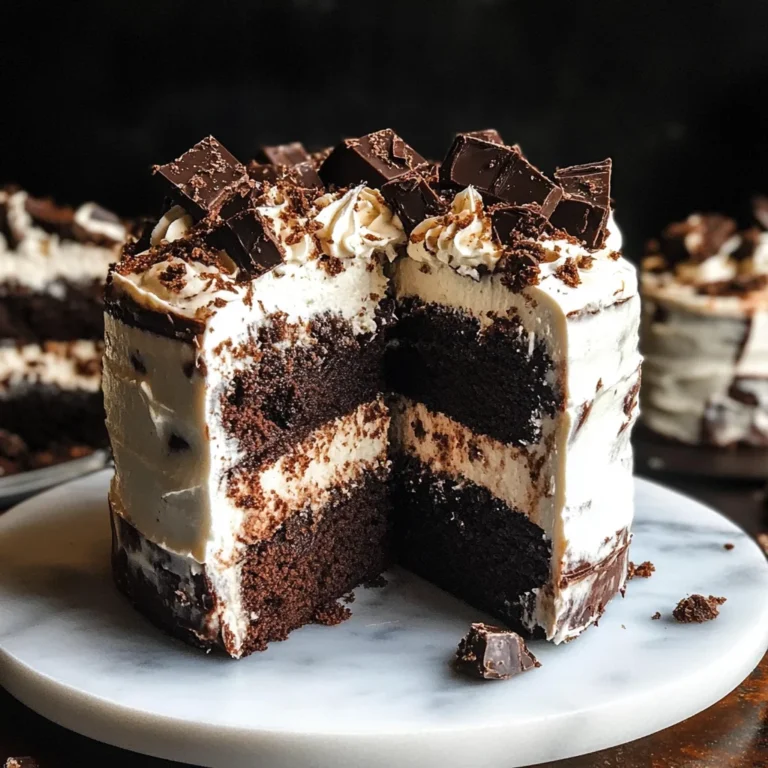
Spider Web Brownies: Spookily Indulgent Treats for Halloween
There’s something irresistibly indulgent about my Spider Web Brownies that makes them a must-have for any festive gathering. Picture this: fudgy, rich, chocolatey, and delightfully spooky, these brownies not only satisfy your sweet tooth but also pack in a protein punch with 4 grams per serving. I created this recipe as a fun treat for Halloween when I wanted to combine my love for baking with a little holiday flair, making sure it would be a hit among my teenagers while keeping those calories in check at just 250 each.
I still remember the first time I made these Spider Web Brownies. It was a chilly October afternoon, and my kids were buzzing with excitement about Halloween. As soon as they saw the web design topping the brownies, their eyes lit up, and my youngest exclaimed, “These are amazing! Can we eat them all right now?” The secret ingredient that sets these brownies apart is the swirl of marshmallow cream that adds both texture and sweetness to each bite. With rave reviews and requests for seconds from my family, it quickly became a cherished tradition in our home.
Ingredients for the Spider Web Brownies
Each ingredient in this dish plays an essential role in flavor and texture. Here’s what you’ll need:
- 1 cup granulated sugar: Creates sweetness and enhances the fudgy texture.
- 1/2 cup unsalted butter (melted): Adds richness and moisture to the brownies.
- 2 large eggs: Provide structure and help bind the ingredients together.
- 1 teaspoon vanilla extract: Infuses warmth and depth of flavor into the brownies.
- 1/3 cup unsweetened cocoa powder: Delivers a rich chocolate flavor for that fudgy base.
- 1/2 cup all-purpose flour: Contributes to the structure while keeping the brownies soft.
- 1/4 teaspoon salt: Balances sweetness and enhances overall taste.
- 1/4 teaspoon baking powder: Helps achieve a light, airy texture in the brownies.
- 1/2 cup white chocolate chips (melted): Forms a creamy base for the spider web design.
- 1/4 cup black decorating gel: Adds a fun, spooky element to complete the festive look.
Step-by-Step Instructions
I recommend starting with preheating the oven since it takes a little time to reach the right temperature, ensuring your brownies bake perfectly as you prepare the batter.
Step 1: Preheat your oven to 350°F (175°C) and grease an 8×8-inch baking pan. This step is crucial because a properly greased pan helps prevent the brownies from sticking, making for easy removal later. You can use cooking spray or butter for greasing, but be sure to cover all corners of the pan.
Step 2: In a mixing bowl, combine the melted butter and granulated sugar. Mix well until fully incorporated; this is where your brownies start to gain that fudgy texture we all love. I usually use a whisk for this step, as it helps to dissolve the sugar more effectively and creates a smooth mixture.
Step 3: Add the two large eggs and one teaspoon of vanilla extract into the mixture, whisking until smooth. The eggs will not only bind everything together but also add richness to your brownies. I always make sure my eggs are at room temperature for better mixing; this helps achieve a more homogenous batter.
Step 4: Sift in one-third cup of unsweetened cocoa powder, half a cup of all-purpose flour, a quarter teaspoon of salt, and a quarter teaspoon of baking powder. Stir gently until just combined; over-mixing can lead to dense brownies instead of that delightful fudgy texture. Make sure no dry ingredients remain visible, but don’t worry if there are a few small lumps.
Step 5: Pour the brownie batter into your prepared baking pan and spread it evenly using a spatula. This ensures even baking throughout, so every bite is just as delicious as the last. Since the batter will be thick, I usually dollop it around the pan first before spreading it out for easier handling.
Step 6: Bake in your preheated oven for 25-30 minutes or until a toothpick inserted in the center comes out clean or with just a few moist crumbs attached. Keep an eye on them towards the end; you want that perfect balance between fudgy and fully cooked without drying them out—golden brown edges with a soft center are ideal.
Step 7: Allow the brownies to cool completely in the pan before decorating them. This cooling process is vital because if you try to decorate too soon, you risk melting your toppings or making a mess. Patience pays off here; let them sit while you gather your decorating supplies.
Step 8: Once cooled, melt half a cup of white chocolate chips and pour them into a piping bag or zip-top bag with one corner snipped off. This allows for better control when drizzling over your brownies—creating that beautiful spiral design will really bring your spider web to life!
Step 9: Drizzle the melted white chocolate in a spiral pattern on top of your cooled brownies. I find starting from the center and working outward gives me more control over my design. Don’t worry about perfection; this is Halloween fun after all!
Step 10: Using a toothpick or skewer, drag lines from the center of the brownie toward the edges to create that classic spider web effect. Be gentle but deliberate; this is where you can really get creative!
Step 11: Finally, use black decorating gel to add spiders or any additional designs as desired—this is where you can let your imagination run wild! My family loves getting involved in this part; it’s not just about taste but also about having fun with presentation!
What to Serve with Spider Web Brownies
This dish is already incredibly filling and balanced, but these sides add extra variety and nutrition to round out your meal perfectly.
Pumpkin Spice Yogurt Parfait: Layering Greek yogurt with pumpkin puree, a sprinkle of cinnamon, and granola creates a creamy, spiced complement to the rich chocolate of the brownies. The tangy yogurt adds protein and healthy fats, enhancing the overall nutritional profile with about 15 grams of protein per serving. This parfait has become a family favorite during fall, making it an easy and festive addition to our Halloween celebrations.
Garlic Roasted Broccoli: Tender broccoli florets tossed in olive oil, minced garlic, and a pinch of salt before roasting highlight the earthy flavors that balance the sweetness of the brownies. This dish not only provides essential vitamins like C and K but also offers healthy fats from the olive oil. My kids love the crispy edges, making it a go-to side when we want to sneak in some greens without a fuss.
Cinnamon Sugar Pita Chips: These crunchy pita chips brushed with melted butter and sprinkled with cinnamon sugar create a delightful contrast to the fudgy texture of the brownies. They’re easy to whip up for a fun snack option that adds crunch while still keeping calories low — about 100 calories per serving. We often enjoy them as a family movie night treat alongside our brownies for an extra sweet touch without going overboard.
Quinoa Tabouli Salad: This fresh salad combines quinoa, parsley, tomatoes, cucumber, and lemon juice for a light side that enhances the flavor profile with its zesty notes. It pairs beautifully with the rich chocolate and creamy white chocolate topping while adding about 8 grams of protein per serving thanks to the quinoa base. My family loves this as it’s not only nutritious but also meal prep-friendly; I can make a big batch at the start of the week!
Spiced Apple Slices: Thinly sliced apples dusted with cinnamon and baked until tender provide a sweet yet tart contrast that complements the brownies’ richness perfectly. This simple side offers fiber and vitamins while keeping calories low — around 70 calories per serving. It’s always nice to have this healthy alternative on hand during Halloween festivities so my kids can enjoy something sweet without all the added sugar.
Storage & Serving Tips
To store your Spider Web Brownies, place them in an airtight container and keep them in the fridge for up to 5 days. For optimal freshness, it’s best to store the brownie base and spider web topping separately. Keep the Brownie Base in one container, ensuring it’s fully cooled before sealing. The melted white chocolate chips can be stored in a small container, while the black decorating gel should be kept in its original tube or a small airtight container to maintain its texture.
When it comes to reheating, simply place the brownie base in a preheated oven at 350°F for about 10 minutes until warmed through. Avoid using the microwave, as it can make the brownies too soft and lose that fudgy texture you love. The spider web topping doesn’t require reheating; instead, drizzle it over the brownies just before serving for that fresh look. If you do wish to melt any leftover white chocolate chips again, use a double boiler on low heat for best results.
Pro tip: To batch cook these Spider Web Brownies for the week, consider doubling the recipe and portioning them out into individual containers for grab-and-go treats. Family members can easily self-assemble their own brownies by adding fresh spider web designs using the gel at serving time. For variety across the week, try swapping out half of the all-purpose flour for almond flour or adding a touch of peppermint extract instead of vanilla extract for a festive twist. Remember to store any extra white chocolate chips separately to keep their creamy texture intact until you’re ready to use them!
Conclusion

These Spider Web Brownies have become a regular rotation recipe for me, as I whip them up at least twice a month because they’re not only deliciously fudgy but also pack a satisfying 250 calories per serving without losing the fun of dessert. The unique addition of the melted white chocolate chips creates a rich and creamy topping that truly elevates these brownies above your typical Halloween treats. Make sure to give this one a try this week; you won’t regret it! I promise it’ll become a regular in your house too.